Lettuce Plants Are Perfect for Container Gardening
There’s lots of talk about food waste these days, and a lot of that waste comes from foods we buy at the grocery store and that then go bad in our fridges. Don't feel guilty if this happens to you. A key factor people aren’t discussing when they bring up food waste is that some foods just aren't adaptable to our current food trucking system.
Salad greens are number one on the list of foods that can't handle traveling long distances. These leafy greens have tender cells and vascular systems that make it difficult—if not impossible—to stay fresh (and edible) on an 18-wheeler and then a grocery store shelf.
The solution?
Grow your own!
These greens don’t require much space, time or sunshine... which means all of us can do this! Plus, you can harvest some leaves, come back, and harvest some more later so the salads never stop.
Follow these simple steps to grow your own little container garden of lettuce plants, and you'll be harvesting your own gourmet, homegrown greens in no time!


Materials Needed for This Easy Container Garden
To create this cut-and-come-again salad planter, you only need a few materials:
- A container that's at least 1 foot wide and about 1 foot deep
- A drill or hammer and nail to create drainage holes
- Weed barrier cloth
- Scissors
- Organic compost
- Lettuce seeds or plants
All right, roll up your sleeves and let's get started!


Step One
Create Good Drainage for Your Container Garden
The first step is to create drainage holes in your container. Salad plants like to be well-watered but they don't like sitting in water. By creating drainage holes, you'll ensure that your plants get the water they need but don't drown.
Create at least one drainage hole for every square foot of your planter. If there's already a drainage hole, you can skip this step (obviously).


Step Two
Place a Weed Barrier Cloth at the Bottom of the Container
Cut a weed barrier cloth to the right dimensions to place at the bottom of your container. This ensures that your soil (and all its nutrients) won't leach from your container as you water it or it receives rainfall over the season.
This isn't an absolute necessity, but it's a great addition to ensure that the nutrients from your soil stay in your container as your salad grows over the season.


Step Three
Fill Your Container with Organic Compost
I'm keeping it simple in this step by using just one simple ingredient to grow your cut-and-come-again salad plants: 100% compost. Leafy greens thrive in compost.
The only thing: be certain you maintain a consistent watering plan for your salad garden. Salad plants don't like to dry out, and compost won't hold water as well as a clay-based or top-soil-based soil mixture will do.
You can make your own compost or find one at your local nursery (or from a local farmer). Just be sure the compost is completely cured before using it in your planter.


Step Four
Plant Your Cut-and-Come-Again Salad
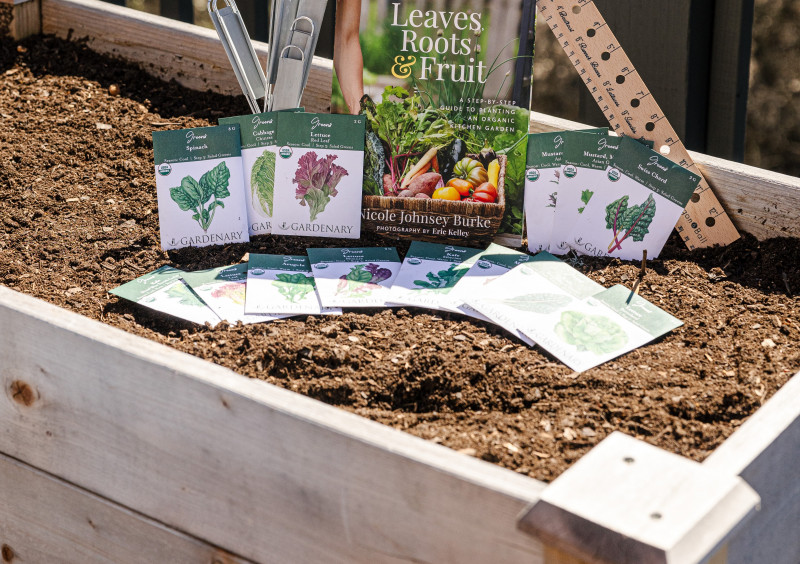
Now it's time to fill your salad planter with some actual salad. You can use just one packet of salad seeds for this project, or you can plant small salad seedlings. Both work. In general, it's better to start salad plants from seed because they have fragile root systems and don't transplant well.
You can use a variety of lettuce types in your cut-and-come-again salad planter. Here are a few of my favorites:
- Romaine
- Buttercrunch
- Spinach
- Rocky Top Lettuce Mix
After you plant your lettuces, carefully water in your salad planter around each and every plant or very gently over the seeds you've just installed.
Keep your salad planter in a spot that receives at least four hours of sunlight and check the water moisture level every day to be sure your planter isn't dry (or too wet).
If you've planted cut-and-come-again salad seeds, be sure your container's soil doesn't get dry in the least bit until those seeds have sprouted. Once lettuce seeds begin to open up and grow, they don't like to dry out.
Step Five
Enjoy Salads from Your Container Garden (and Skip Past the Grocery Store Boxes)
If you installed plants in your cut-and-come-again planter, you can start harvesting from the outside of your plants right away.
Cut a few leaves from the outside of each plant and leave the center leaves of the plant to keep on growing. It's literally cut and come again. Get it?
If you've planted seeds, give your seeds a few weeks to sprout and start growing before cutting. If your seeds come up too close together, take time to thin them by cutting the one- to two-inch-tall seedlings at the soil level and enjoy them as microgreens or sprouts as a topping on a sandwich or soup.
In about 45 days, you can start harvesting from your salad planter and changing the world for the better.


Every time you grow a little of your own salad, you make a huge difference in the world.
Each piece of lettuce you harvest from your porch or patio means less fuel, less packaging, and less waste for our country's food system.
Thanks for bringing back the kitchen garden with me by growing a little bit of your own food!