
At a Glance
- A soil blocker (also called a soil block maker) compresses seed-starting mix into firm, self-contained blocks that act as both container and growing medium, eliminating the need for plastic trays.
- Soil blocking produces stronger seedlings with better root systems, less transplant shock, and a cleaner, lower-waste seed starting setup.
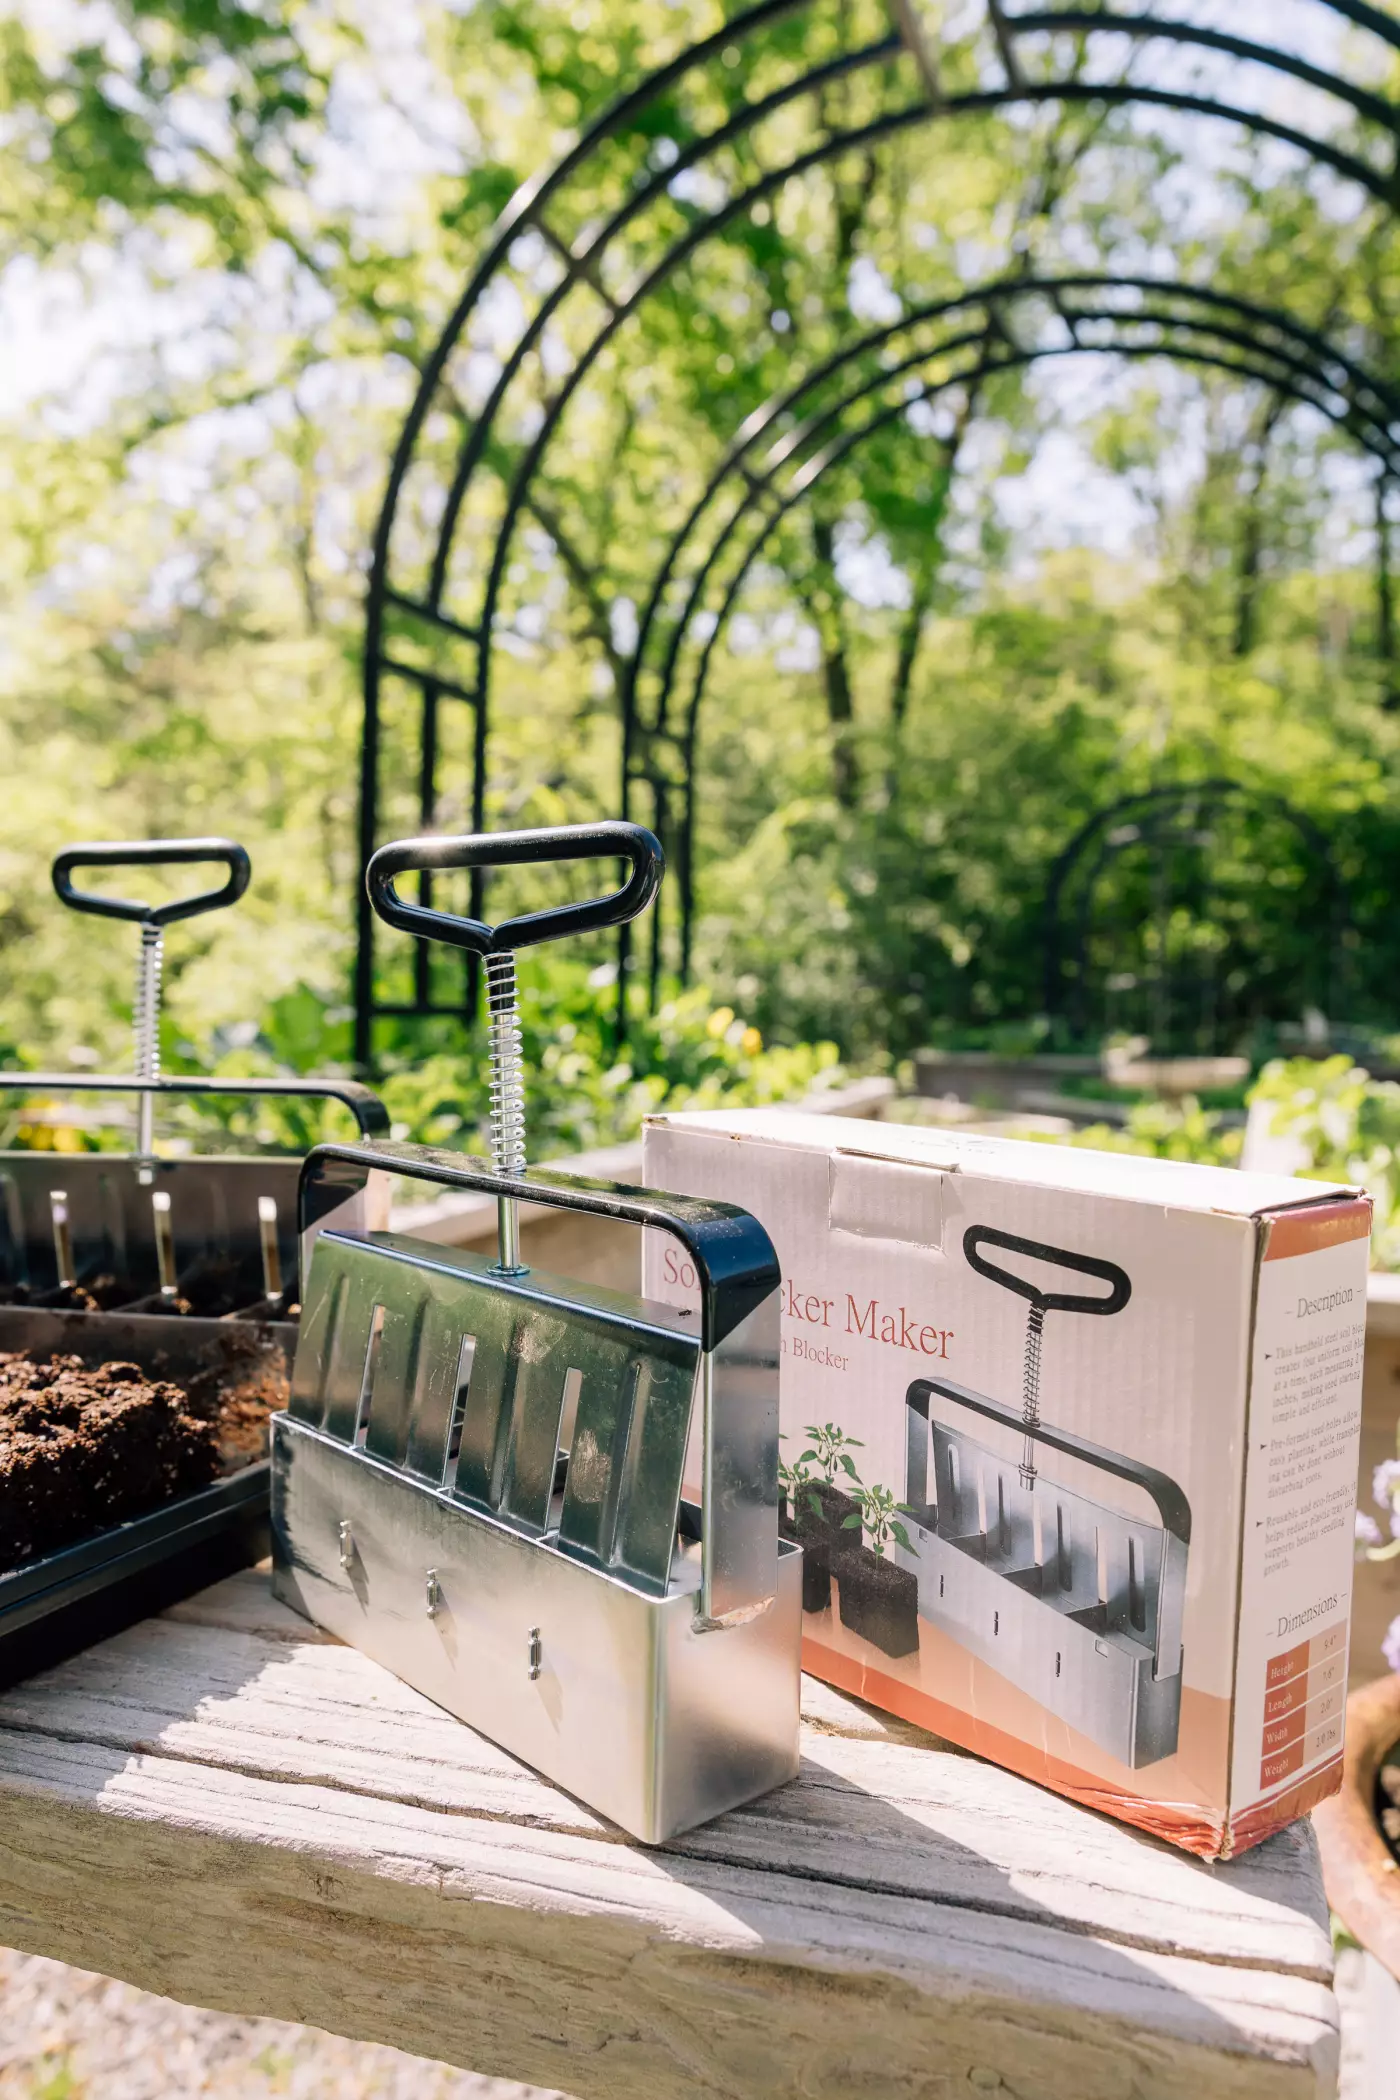
- The Gardenary Soil Blocker is easy to use and makes 4 uniform 2-inch blocks per press, with built-in dibber pins, heavy-duty zinc-coated steel construction, and a comfortable wooden handle.
What Is a Soil Blocker and What is the Benefit?
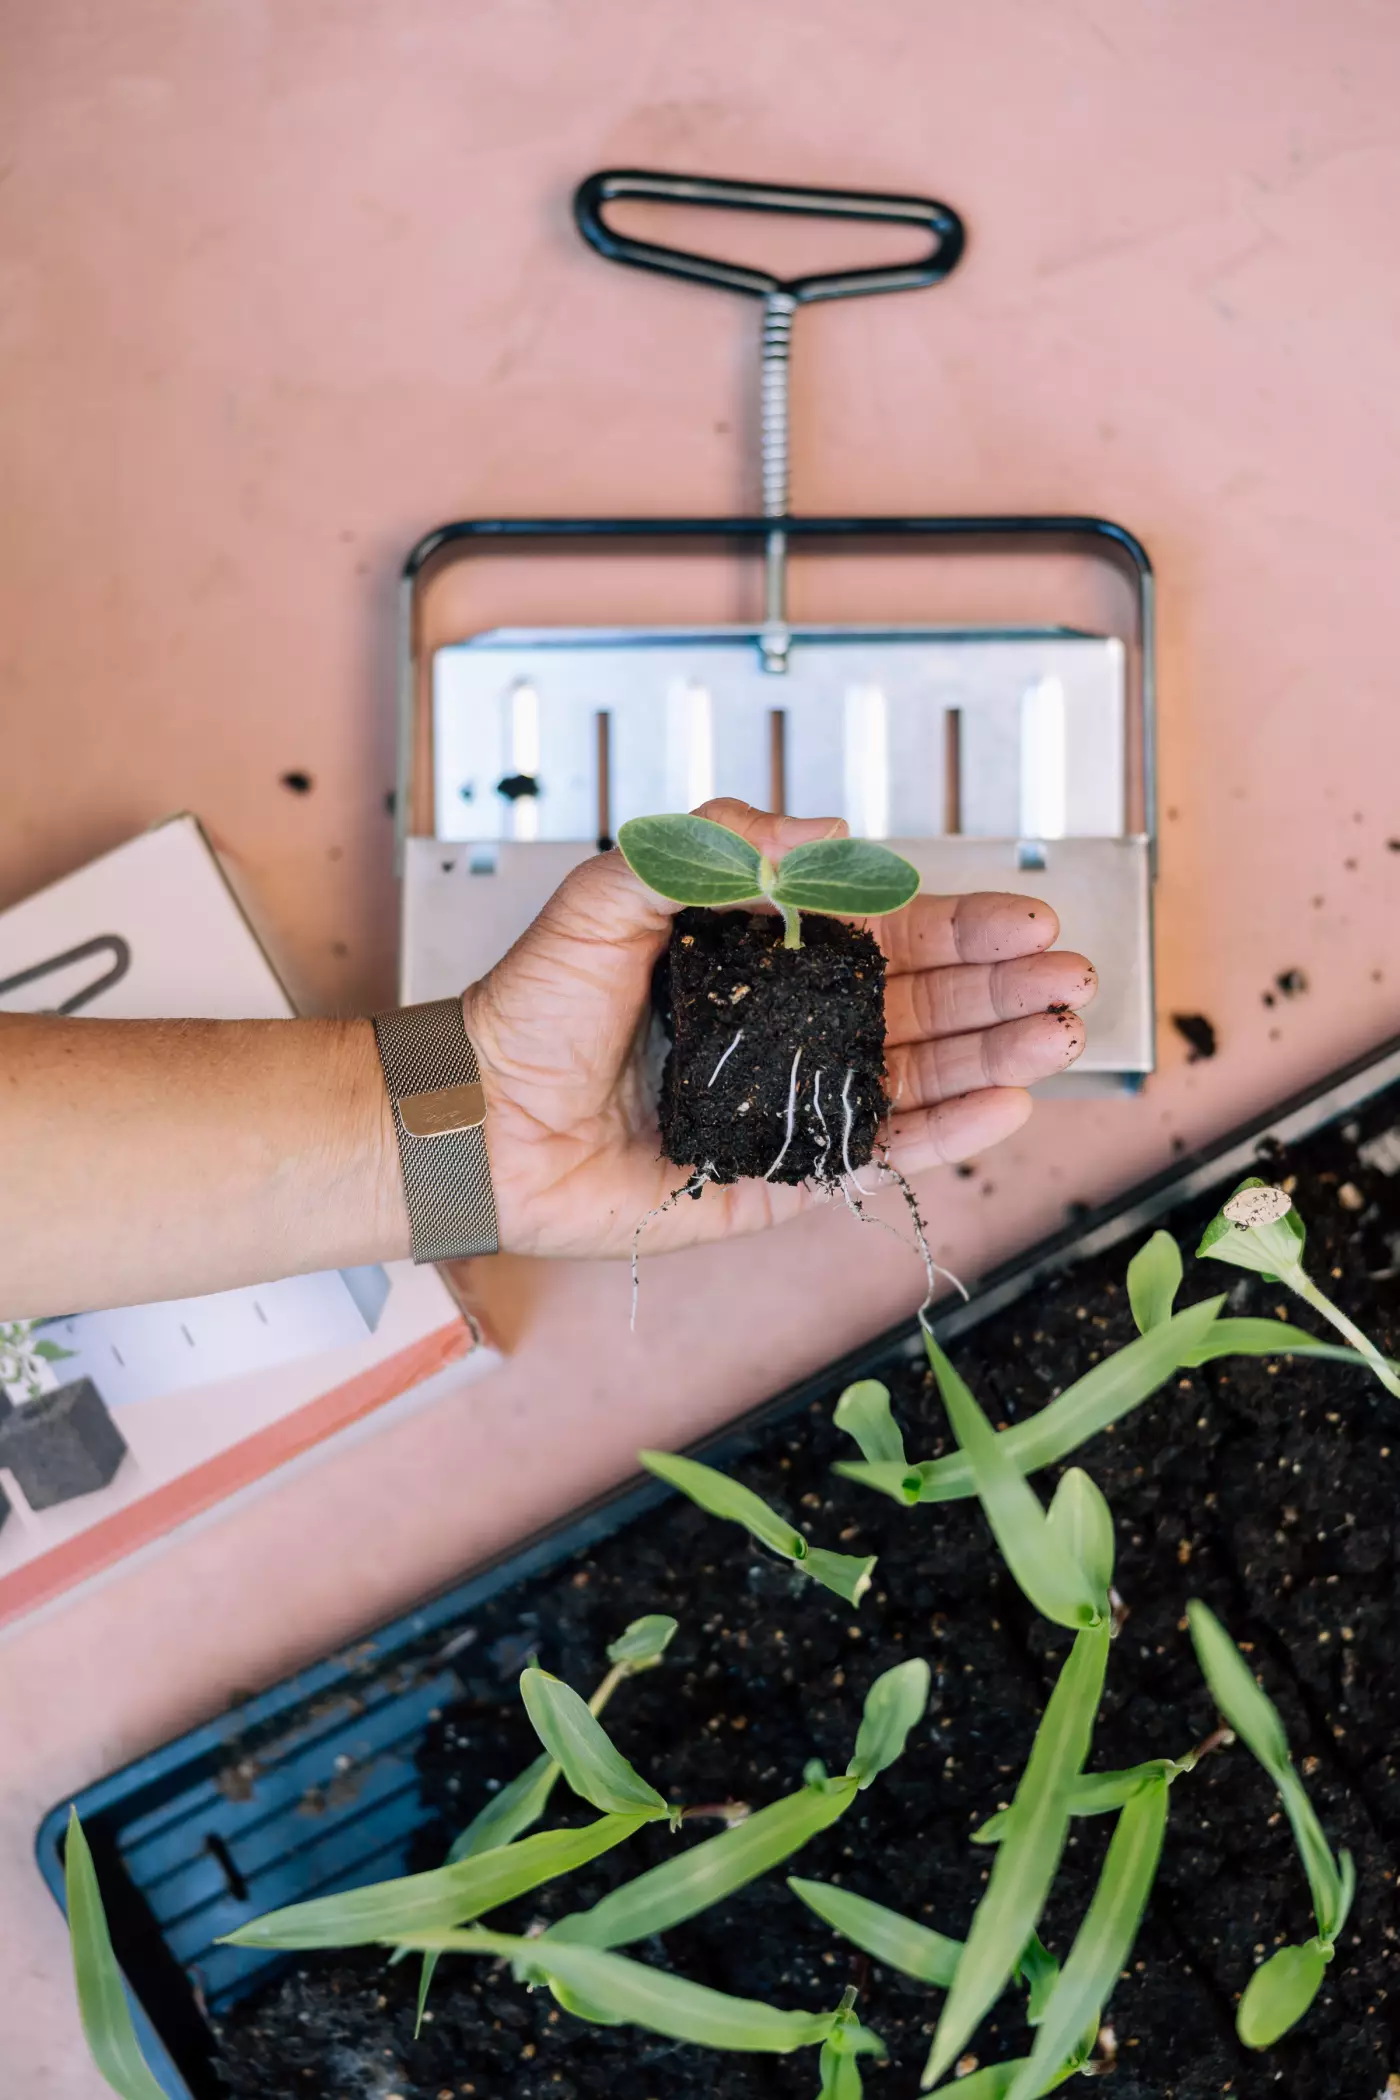
A soil blocker is a hand-held tool that compresses moistened seed-starting mix into firm, uniform blocks. Each block acts as both growing medium and container — no plastic trays, no pots, no waste. When it's time to transplant, you lift the entire block and plant it directly. No pushing, no pulling, no root disturbance.
Here's why soil blocking produces noticeably healthier seedlings than the plastic tray method:
- No transplant shock — the seedling moves to the garden in its block with roots completely undisturbed, making the transition dramatically smoother
- Stronger roots through air pruning — when roots reach the edge of a soil block they hit air, not plastic. That stops circling and triggers the plant to grow more lateral branching roots instead — producing a denser, more developed root system
- Better oxygen flow — roots access oxygen from all sides of the block, not just the top, supporting faster and healthier establishment from day one
- Less plastic, cleaner setup — no cells to wash, store, replace, or throw away. One good soil block maker handles season after season with nothing disposable required
For gardeners who start seeds regularly, switching to a soil block maker changes the whole experience.

Better Seedlings Start Here
This soil blocker is built from heavy-duty zinc-coated steel to last for years, with built-in dibber pins that create seed-sowing indentations automatically. Cleaner setup, healthier seedlings, better harvests.


What to Look for in a Soil Block Maker
The soil blocker market is full of cheap options that look similar in photos, but perform differently or may not be as durable.
Here's what actually matters when choosing a soil blocker tool:
- Construction material — look for heavy-duty zinc-coated or stainless steel. Lightweight or plastic-heavy tools warp quickly under the pressure required to make firm blocks and won't last more than a season or two.
- Block size — 2-inch blocks are the most versatile size for home gardeners, suitable for a wide range of vegetables, herbs, and flowers. Smaller blocks work for high-volume production; larger blocks are for seeds that need more space before transplanting.
- Built-in dibber pins — the best soil block makers include pins that create a seed-sowing indentation in every block automatically. This small detail saves a surprising amount of time when sowing at volume.
- Handle comfort — making a full tray of soil blocks requires real downward pressure. A comfortable, solid handle makes a meaningful difference over a long seed-starting session.
- How many blocks per press — a 4-cell blocker is the standard for home gardeners and the most practical size for the seed-starting volumes most kitchen gardeners work with.
The Gardenary Soil Blocker — Built for the Kitchen Gardener
The Gardenary Soil Blocker was designed specifically for the way kitchen gardeners start seeds — in volume, with intention, and without a collection of plastic trays taking over the potting bench.
It makes 4 firm, uniform 2-inch soil blocks per press. Built-in dibber pins create a seed-sowing indentation in every block automatically. Heavy-duty zinc-coated steel construction means it holds up to consistent use season after season. And the comfortable wooden handle gives you the grip and leverage you need for firm, consistent pressing — even on a full tray.
What's in the box:
- 1 four-cell soil blocker — makes 4 blocks per press
- Each block: 2 inches × 2 inches
- Built-in seed dibber pins included
Why gardeners love this soil block maker:
- Produces 4 uniform blocks in one press — fast and consistent
- Eliminates plastic cell trays season after season
- Reduces transplant shock
- Air pruning naturally creates stronger, more branched root systems
- Seedlings transplant cleanly
- Zinc-coated steel construction built to last for years
- Pairs perfectly with the Gardenary Complete Guide to Indoor Seed Starting
Soil Blocker Highlights
- Makes 4 soil blocks simultaneously — each a perfect 2" square
- Built-in dibber pins create a seed-sowing indentation in every block
- Heavy-duty zinc-coated steel construction for long-lasting durability
- Comfortable wooden handle for firm, consistent pressing
How to Use a Soil Blocker — Step by Step
Using a soil block maker is straightforward once you understand the key variable: moisture. The mix needs to be wetter than you'd use for standard seed starting — closer to firm brownie batter than damp potting soil.
Step 1: Prep Your Mix
Moisten your seed starting mix until it holds together like firm brownie batter — wetter than standard consistency, so the blocks hold their shape when pressed. Mix in a large bowl or bucket and let it hydrate for at least an hour before blocking. If you squeeze a handful and water seeps between your fingers, the consistency is right.
Quick Tip: Keep some dry mix nearby to add if you over-saturate. It's much easier to add dry mix than to drain a soggy one.
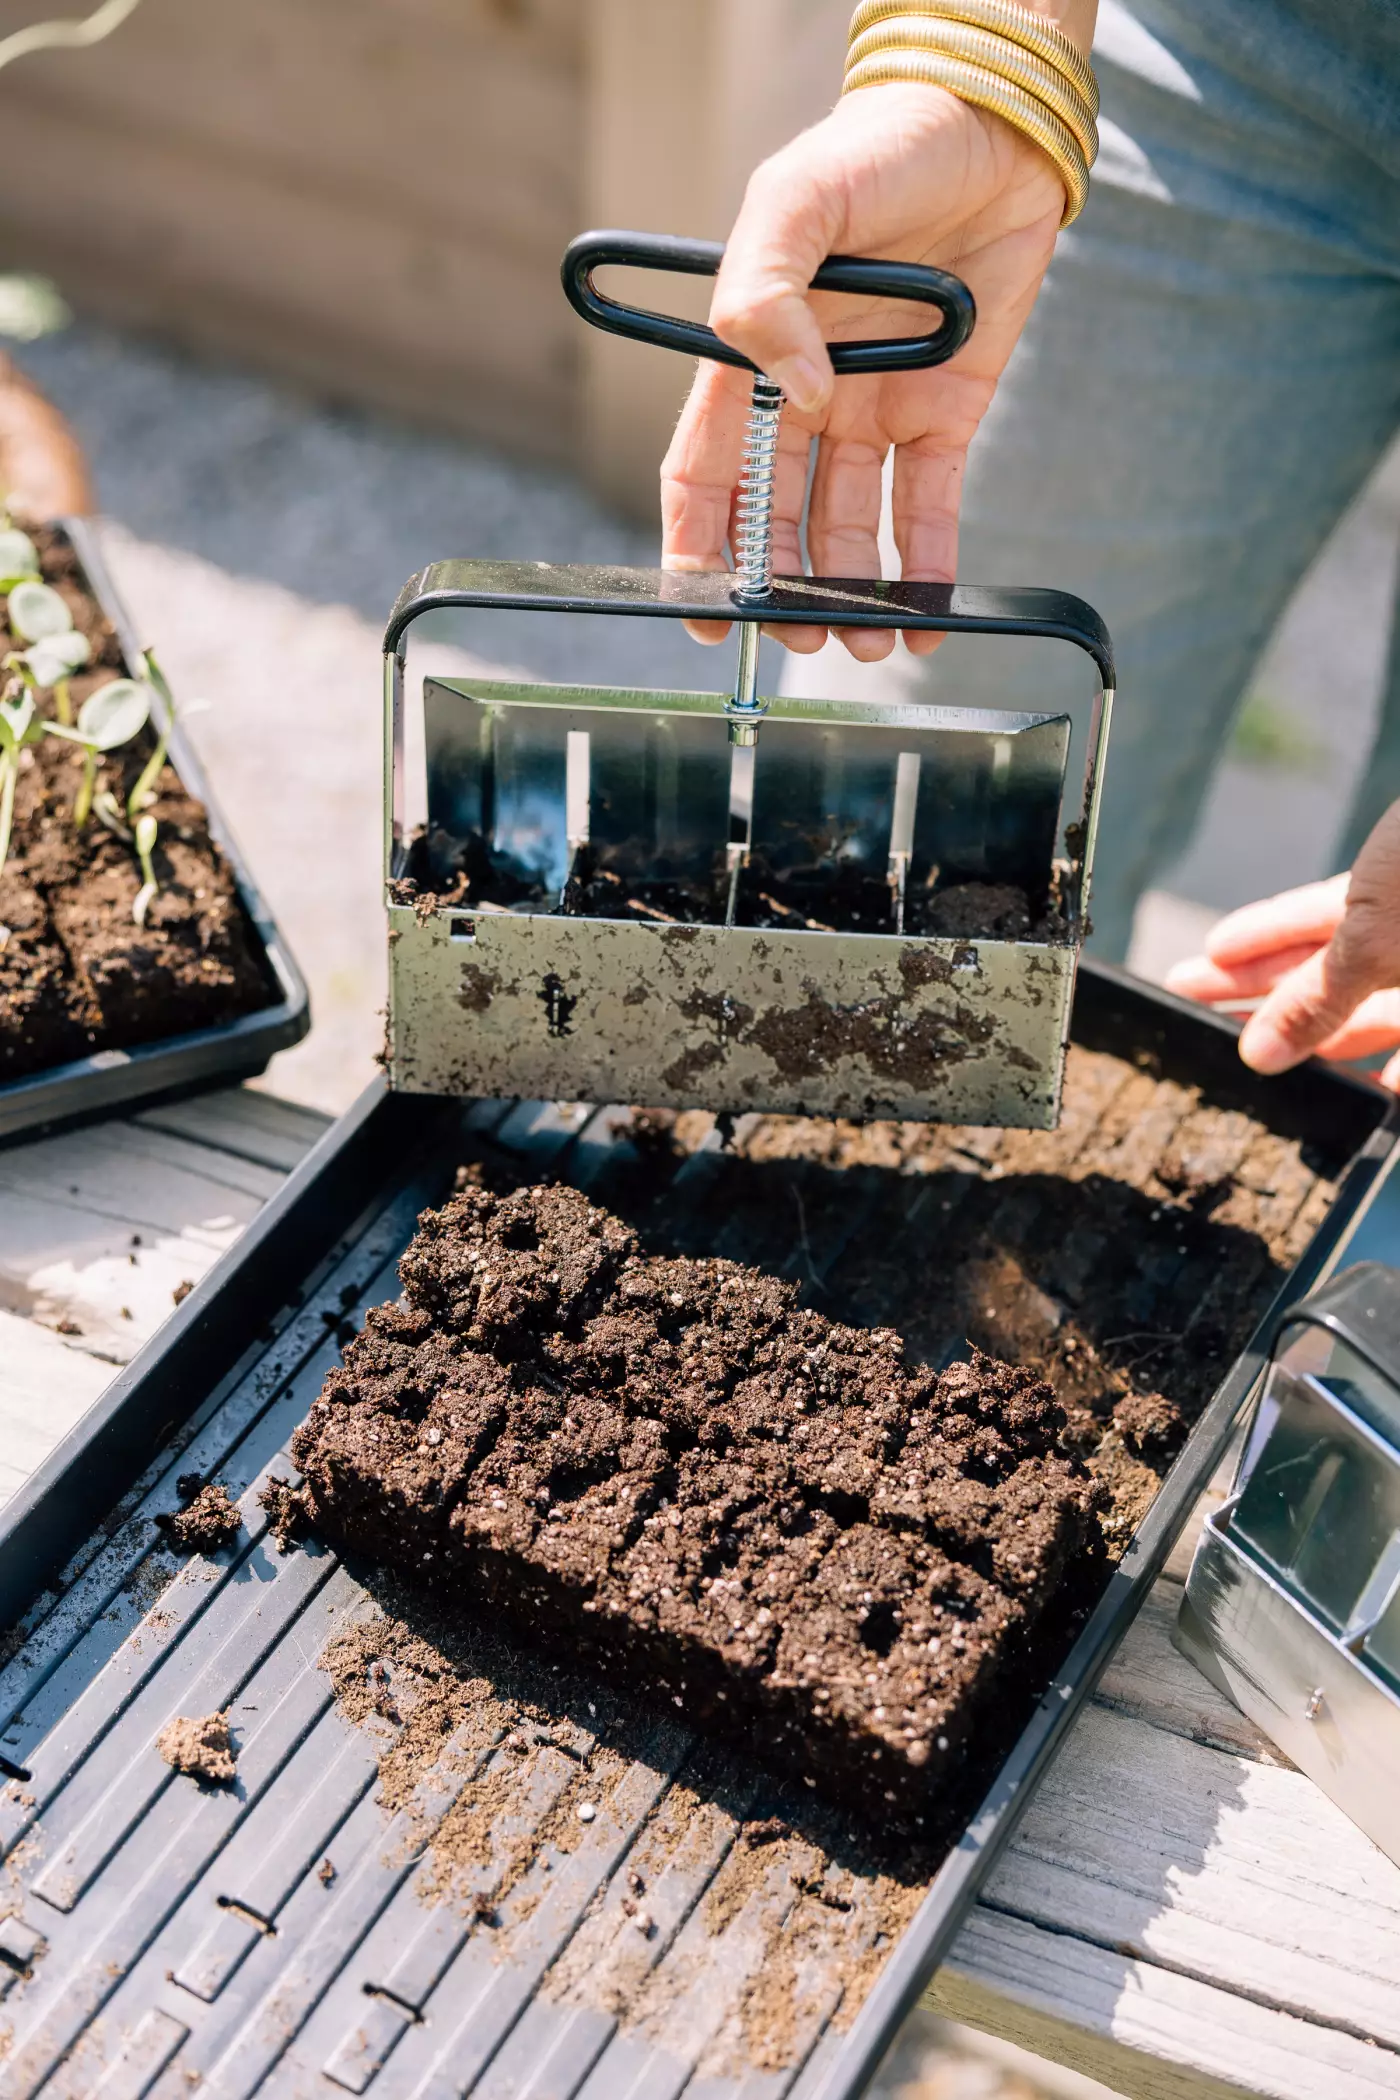
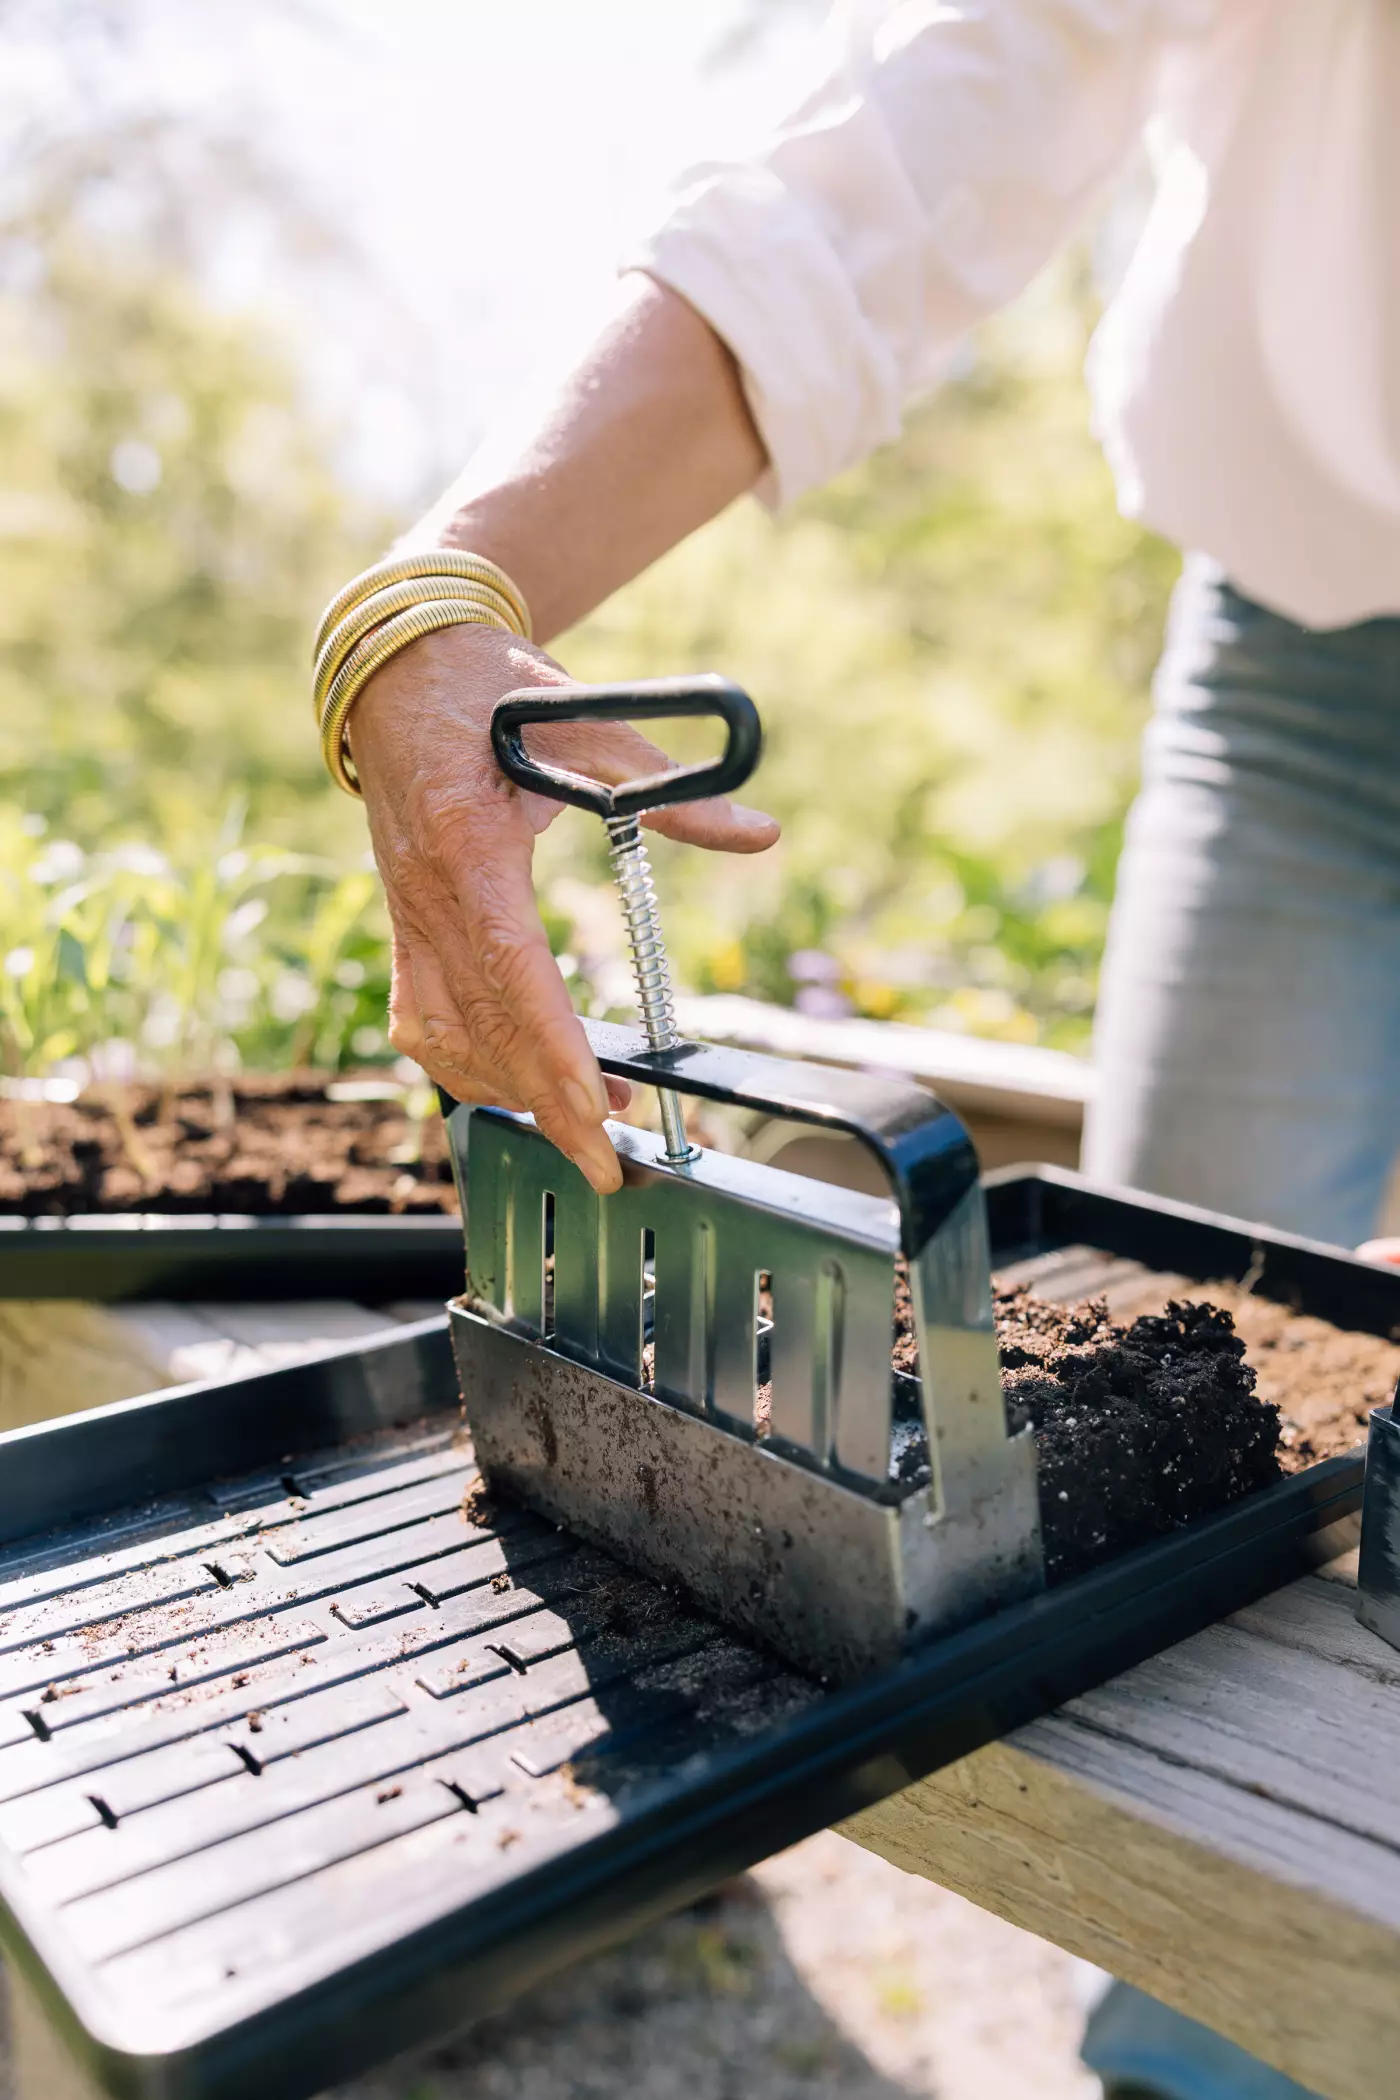
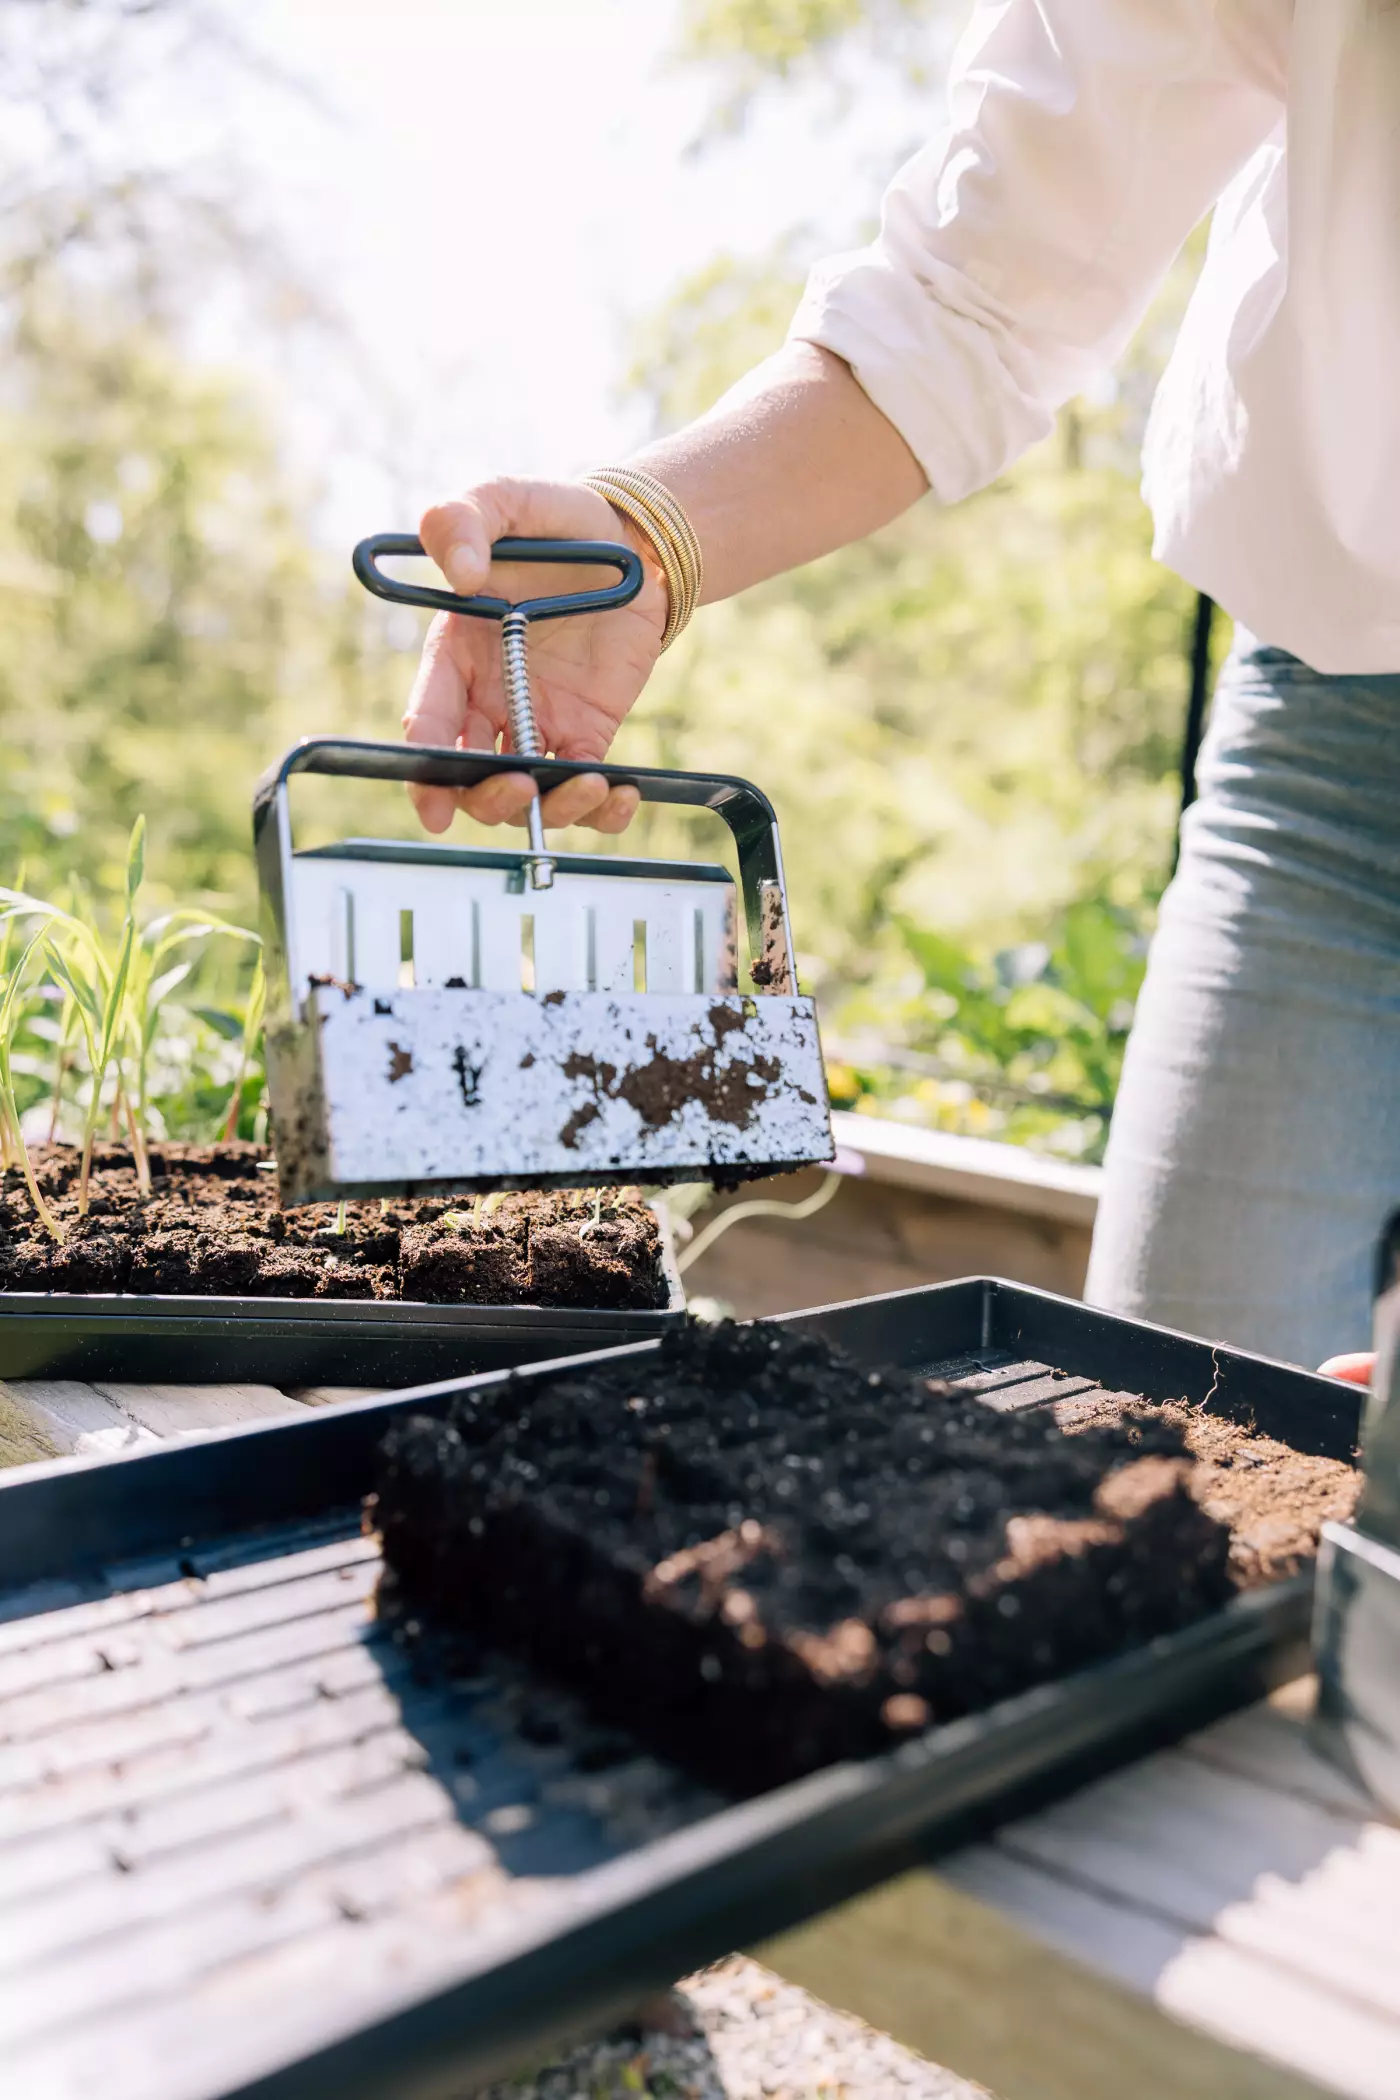
Step 2: Press and Release
Push the soil blocker firmly into your moistened mix using a twisting motion to fully pack each chamber. Scrape the base of the blocker across the edge of the tray to create a flat bottom on each block. Place the blocker on your draining tray and press the plunger firmly to release the blocks. They should hold their shape cleanly and sit side by side snugly.
Quick Tip: Rinse the soil blocker between each press so the mix releases cleanly from the chambers every time.
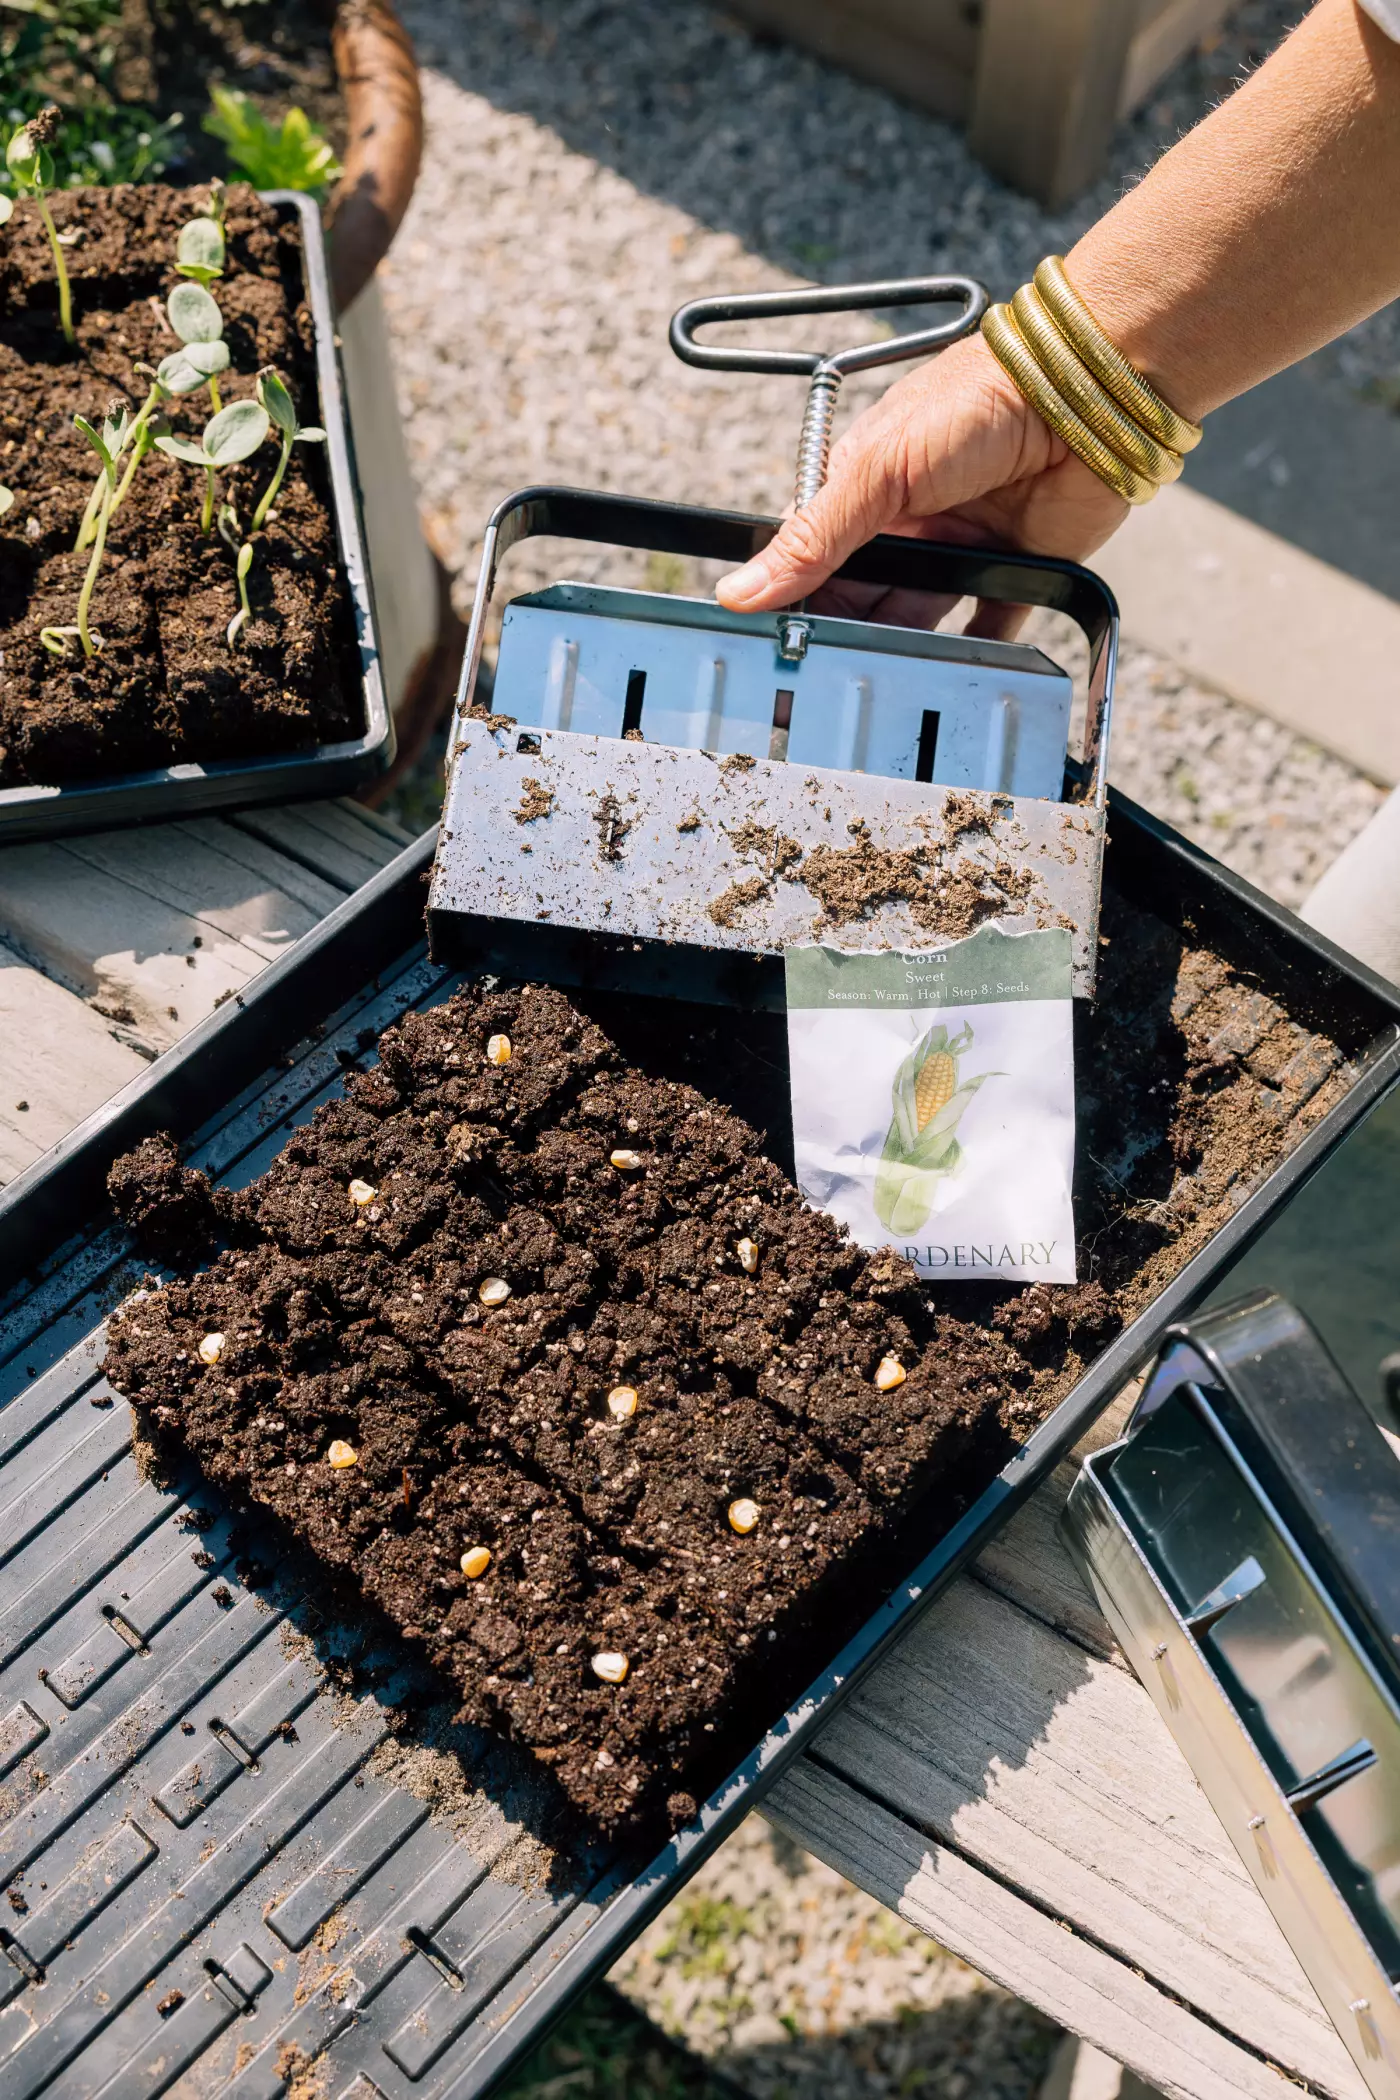
Step 3: Sow Your Seeds
Drop one to two seeds into the small indentation at the top of each block — the built-in dibber pins create this automatically, so your seeds have a perfectly sized hole waiting for them. Cover lightly with a pinch of dry mix if needed.
Step 4: Water From Below
Place your block tray inside a non-draining tray and add water to the bottom — never water from above, which will disturb the blocks and wash seeds out of position. Because soil blocks have no container walls, they can dry out faster than cell trays. Check moisture consistently and water from below as needed to keep blocks evenly moist through germination.
Quick Tip: Move seedlings under grow lights as soon as seeds are sown. Soil blocks need consistent light to germinate well and develop strong early growth.
Who the Gardenary Soil Blocker Is For
This soil block maker is the right tool for:
- Gardeners who want to reduce plastic in their seed starting setup without sacrificing quality or efficiency
- Anyone frustrated by circling roots and transplant shock — the two most common seedling problems that soil blocking eliminates
- Experienced seed starters ready to move to a cleaner, more repeatable method
- Gardeners who start seeds in volume and want consistent results press after press
- Anyone following the Gardenary indoor seed starting method — this tool was designed to work seamlessly with it
If you've been starting seeds in plastic cell trays and wondering why your seedlings struggle at transplant time — this is likely the missing piece.
Shop the Gardenary Soil Blocker at shop.gardenary.com
Frequently Asked Questions About Soil Blockers
What size soil blocker should I buy? For most home kitchen gardeners, a 2-inch 4-cell soil blocker is the ideal size. It's versatile enough for vegetables, herbs, and flowers, produces a manageable number of blocks per press, and works well for the seed-starting volumes most home gardeners work with. The Gardenary Soil Blocker makes four 2-inch blocks per press.
What mix do I use in a soil block maker? You need a dedicated seed starting mix — not regular potting soil. The mix should be light, fine-textured, and able to hold moisture consistently. Moisten it to a firmer consistency than you would for standard seed starting — closer to firm brownie batter — so the blocks hold their shape when pressed and released.
Does soil blocking really reduce transplant shock? Yes, and significantly. The main cause of transplant shock is root disturbance at the moment of moving a seedling from its container. With soil blocking there is no container to remove — the entire block goes into the ground with roots completely undisturbed. This produces a noticeably smoother transition and faster establishment compared to seedlings pulled from plastic cells.
How is a soil blocker different from a regular seed tray? A standard plastic seed tray confines roots in a plastic cell, restricts oxygen flow, and requires the seedling to be pushed or pulled out at transplant time — disturbing roots in the process. A soil block maker produces blocks that expose roots to air on all sides, encourage healthier root development through air pruning, and allow the entire block to be planted without any root disturbance.
What is air pruning? Air pruning happens when roots reach the edge of a soil block and encounter air rather than a plastic wall. That air exposure naturally stops root growth at the boundary and triggers the plant to produce more lateral branching roots instead. The result is a denser, more developed root system that establishes faster and more successfully after transplanting — compared to the circling, tangled roots that develop in plastic cells.
Is the Gardenary Soil Blocker good for beginners? Yes! The Gardenary Soil Blocker is straightforward to use and comes with clear instructions. The built-in dibber pins handle seed hole placement automatically, and the zinc-coated steel construction is forgiving and durable through the learning curve. The main skill to develop is getting the moisture consistency of your mix right, which takes one or two sessions to feel natural.