

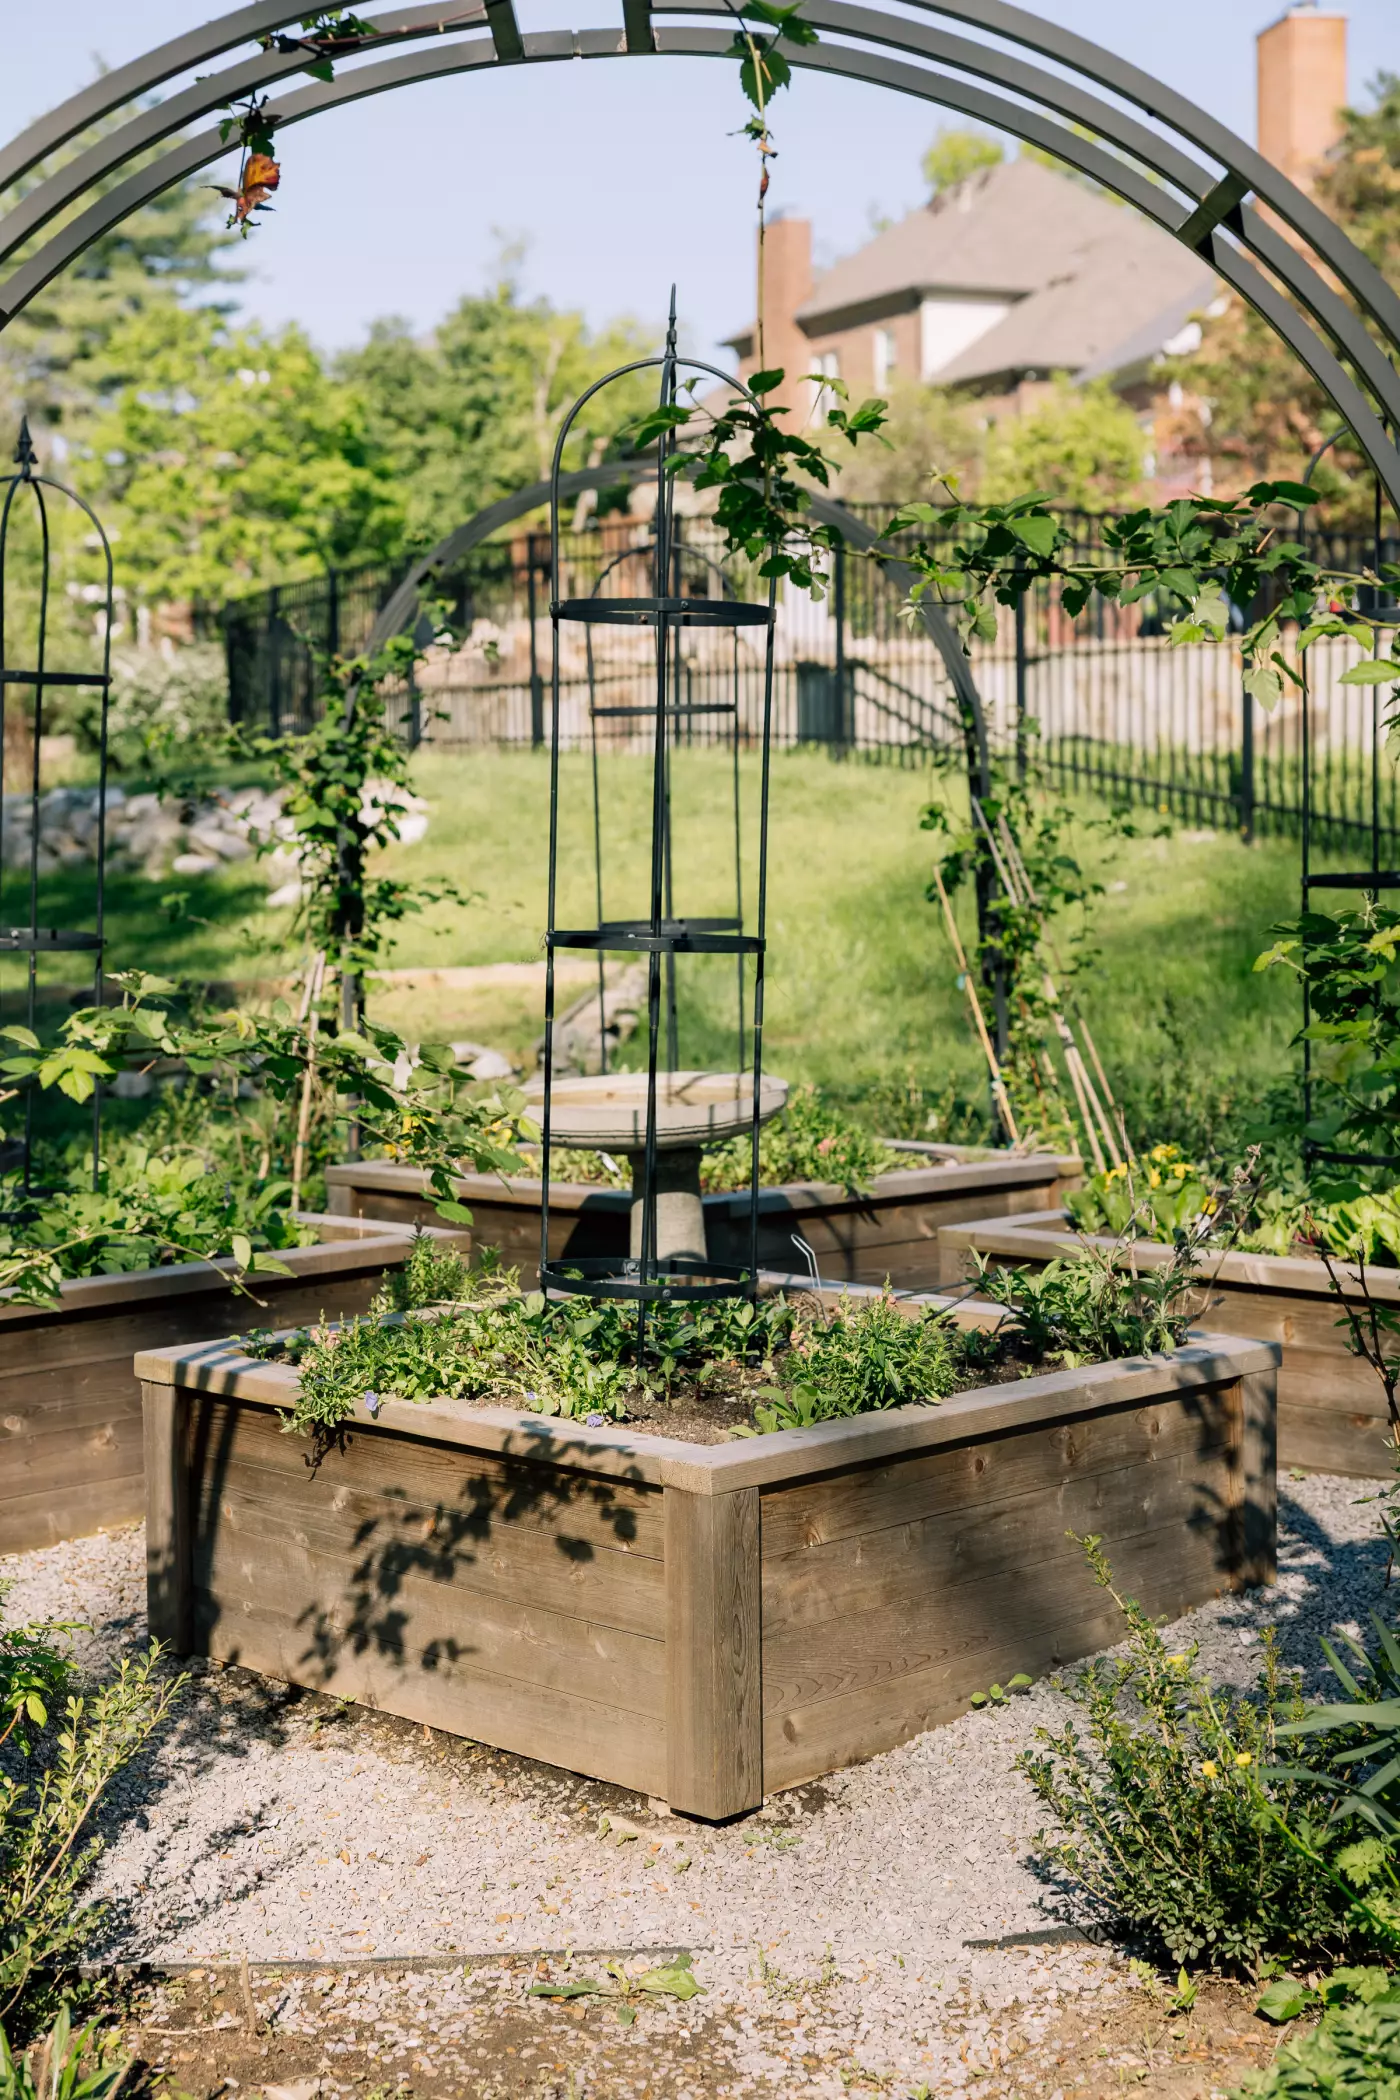
The Gardenary Wide Pillar Obelisk Trellis is a weather-resistant, powder-coated black steel obelisk designed to support climbing vegetables like cucumbers, peas, pole beans, and tomatoes, while also serving as a beautiful centerpiece for raised-bed gardens.
At a Glance
- The Wide Pillar Obelisk Trellis is made from solid steel rods, all powder-coated for lasting weather durability.
- Assembly takes about 20 minutes and is easiest with a partner — no extra tools needed beyond what's included in the kit.
- This trellis is ideal for cucumbers, peas, pole beans, and tomatoes, and works in both raised beds and in-ground gardens.
By Nicole Johnsey Burke: Founder of Gardenary and Author of Kitchen Garden Revival
I've been through a lot of disappointing trellis situations before. Flimsy bamboo that snapped under the weight of my cucumbers. Wire tomato cages that looked like they'd been through a storm by the end of the season. I wanted and needed something that was beautiful and sturdy because in my garden, those two things are non-negotiable.
The Wide Pillar Obelisk Trellis is one of my favorite trellis solutions. I have six of them in my own garden, and I've installed four more in singer-songwriter Ellie Holcomb's Nashville garden.

Why an Obelisk Trellis Belongs in Your Kitchen Garden
If you're not growing vertically yet, you're leaving a lot of growing space on the table. An obelisk trellis is one of the simplest ways to change that.
What vertical growing gives you:
- More food from the same square footage
- Better air circulation around your plants, which means fewer pest and disease problems
- Easier harvesting — no more hunting for cucumbers hiding under leaves on the ground
- A garden that looks beautiful, not just productive
What makes this Gardenary Wide Pillar Obelisk specifically worth it:
- Solid steel construction holds up under the weight of heavy vining crops all season long
- Powder-coated black finish resists weather and looks polished year after year
- Four size options means you can match the trellis to your bed size and what you're growing
- The decorative finial makes it genuinely beautiful even in the off-season when nothing is climbing it
- Easy assembly — no special tools needed
- Flexibility each season - easy to move in and out of your garden as the seasons change
I've had mine through hundreds of rainstorms and one long move across state lines. They still look great. That's the kind of thing you notice when you've wasted money on cheaper trellises that didn't make it through a single season.

Grow up, not out! Get your free vertical growing guide.
This free 28-page ebook shows you how to grow tomatoes, cucumbers, peas, and more on vertical supports — so you get more food, better airflow, and a garden that actually looks beautiful. No extra square footage required.


What Shape Garden is Best for an Obelisk Trellis?
Obelisk trellises are the perfect structural addition to wide gardens, square-shaped raised beds, or circular beds. They make an excellent centerpiece, adding visual height and interest.
They're large enough to support serious climbers like peas, cucumbers, and vining tomatoes, but easy enough to move in and out of your garden as the seasons change. That flexibility is everything when you're rotating crops and planning out a new season.
The design on this one is genuinely elegant. The fleur-de-lis finial at the top, the clean iron bands — it looks like something you'd find in a French kitchen garden. I love that it makes my raised beds look styled and beautiful even in the off-season when nothing is growing on it yet.


I recently added four of these obelisk trellises to Ellie Holcomb's garden in Nashville to give her more vertical growing space. In the picture below, you can see what they look like covered in growth.
If you're considering purchasing our Wide Pillar Obelisk Trellis for your space, keep reading to find more information about the trellis material, dimensions, and assembly directions.


Wide Pillar Obelisk Trellis Material
This obelisk is constructed of solid steel rods and flat horizontal steel bands, all powder-coated black. Metal gives you the sturdiest structural support for your climbing plants, and it's the most durable of the trellis material options available.
Benefits of Powder-Coated Steel:
- Weather-resistant — stands up to rain, heat, and cold
- Won't chip, flake, or fade over time
- Keeps its sharp black finish season after season
- No painting or maintenance required
- Looks just as good in year five as it did in year one
Dimensions of the Wide Pillar Obelisk Trellis
This trellis comes in four sizes:
- Small: 62" tall x 13¾" wide — 14 lbs
- Medium: 73.6" tall x 14.2" wide — 16 lbs
- Large: 86" tall x 16" wide — 18 lbs
- Extra Large: 94" tall x 21" wide — 20 lbs
All heights include the decorative finial on top.
Planting tips for an obelisk trellis:
- When buying an obelisk trellis, look for a diameter of at least 12" to fit four vining plants comfortably around the outside (all of our wide pillar obelisks are big enough).
- Plant around the exterior of the obelisk, not in the center
- Interior planting wastes growing space and makes harvesting harder
Wide Pillar Obelisk Trellis
- Perfect for vining vegetables like tomatoes, cucumbers, pole beans, and peas
- Solid steel rods and flat horizontal steel bands for sturdy climbing support
- Powder-coated black finish
- Available in four sizes
- Topped with a decorative finial
- All assembly hardware included
- Free bonus: Gardenary Guide to Vertical Growing ebook delivered to your inbox immediately after purchase!


Notes on the Wide Pillar Trellis
This trellis ships across the continental US and arrives in a single flat box. It's not heavy or particularly difficult to assemble, but I recommend grabbing a partner to help you hold the legs in place while you attach the rings. This will help you avoid scratching the metal while you're making adjustments. So promise your spouse, your kid, your neighbor, or a friend that you'll pay them in future cherry tomatoes or something.
Trellis assembly should take about 20 minutes.
Assembling this kit is pretty easy with two people, but here are a couple tips to make the process go smoothly:
- The horizontal rings are intended to go on the inside of the vertical legs. The first set of trellises that I assembled with my kids have the rings on the outside, so you'll see some pictures of incorrectly assembled trellises. The structure obviously still works with the rings on the outside, but you get cleaner lines with the rings on the inside.
- Assemble the trellis on its side on a soft, even surface to avoid scratching the finish. I typically assemble trellises on the grass right next to my kitchen garden. If you're assembling indoors, it's a good idea to put a towel or something down to protect wood or tile flooring.


What to Grow on the Wide Pillar Obelisk Trellis
Vegetables:
- Cucumbers
- Pole beans
- Peas
- Vining tomatoes (best on the large or extra large for maximum height)
Ornamental climbers:
- Passion vine
- Climbing nasturtiums
- Coral vine
- Small gourds
For tomatoes, go with the large or extra large size. Vining tomatoes need the vertical room during a long growing season — they will outgrow a smaller obelisk by midsummer.
Want to know exactly what to plant, when to plant it, and how to keep everything thriving season after season? The Kitchen Garden Academy is the complete self-paced system for designing, building, and growing a raised bed kitchen garden.


Common Mistakes to Avoid With Obelisk Trellises
Not pushing the trellis deep enough into the soil.
Six inches is the minimum. A trellis that tips over in a summer rainstorm — with a full cucumber vine on it — is not a fun afternoon.
Planting in the center of the obelisk.
I know it seems like you're using every available inch, but those interior plants will be shaded, harder to reach, and harder to harvest. Plant around the outside.
Choosing the wrong size for tomatoes.
The medium obelisk is great for most climbers, but vining tomatoes genuinely need the extra height of the large. I've watched plants outgrow a medium by mid-July.
How to Assemble the Wide Pillar Obelisk Trellis
Step One to Assemble the Wide Pillar Obelisk Trellis
Place the two arches together. The bottom arch piece has a little groove to accommodate the top arch piece.
Put the finial on the arch and tighten the nut from underneath with the finial screw.
Note: The side bars of the arches will likely not hold their shape very well right now. They won't be stable until you add the rings.


Step Two to Assemble the Wide Pillar Obelisk Trellis
Firmly insert the connecting rods into each arch leg.


Step Three to Assemble the Wide Pillar Obelisk Trellis
Starting from the top, take one of the rings and assemble it on the inside of the connecting rods, lining up the ring holes with the holes in the brackets. It's important to position the brackets on the outside of the ring so that all the brackets are facing the same way (counterclockwise).
I've built a lot of these trellises at this point, but I still remember building the very first one with my kids and them insisting the ring wouldn't fit. The first ring just takes a little finagling to get it right. We discovered it helps to lay the trellis on its side so that you can adjust each leg a bit easier.
Once you've got the ring in place, insert a bolt where the ring overlaps the bracket, and finger tighten the nut on the inside of the ring. Don't make anything too tight at this stage because you might need to adjust a bit as you go.
Continue securing three more bolts and nuts onto the ring. You'll likely have to move the sides of the trellis around a bit to match the ring.


Step Four to Assemble the Wide Pillar Obelisk Trellis
Repeat step three to attach each of the rings that came with your kit to the connecting rods.
The only difficult part about this step if you're working with the trellis on its side is that the bottom connecting rods aren't securely attached to the rest of the trellis until the trellis is upright (then, gravity holds everything in place).


Step Five to Assemble the Wide Pillar Obelisk Trellis
Check that each of the verticals lines up nicely and that the overall structure isn't crooked. Tighten all nuts and bolts using the small wrenches that were included in your kit.


Celebrate!
Voila! You've turned pieces in a flat box into a beautiful trellis for your garden space! Your Wide Pillar Trellis is now fully assembled and ready to be pushed into the ground or soil of a raised garden bed! Make sure you push the trellis about 6 inches deep to secure it, and picture all the vines that will shortly be snaking their way up these metal sides!


