At a Glance
- A complete, step-by-step plan to design and plant a raised garden bed the right way
- How to choose the best location, layout, materials, soil, watering method, and plants for every season
- A practical system that removes guesswork so your garden is productive, manageable, and built to last
How to Plan a Raised Garden Bed Step by Step
Planning a raised garden bed can feel like a big project, especially when you’re trying to make good decisions upfront and avoid expensive do-overs later. The good news is that it becomes completely manageable when you break it into smaller steps and follow them in order.
This guide walks you through the full process from choosing the right spot for your garden to filling and planting your raised bed. You’ll get both the “why” and the “what to do next,” plus quick bullet-point summaries that you can easily follow without getting stuck.

Free Class! Plan Your 2026 Garden.
Save your spot and learn from Nicole! This masterclass gives you a simple, seasonal plan so you can grow with confidence. Learn how to plan, plant, and grow a garden, no matter your experience level.
Step 1: Choose a Location

How to Choose the Best Location for Your Raised Garden Bed
If you only make one “big” decision correctly, make it this one. Location is everything because it affects plant health, harvest size, watering effort, and how often you’ll actually use your garden.
Location Priorities in Order of Importance:
- Sunlight
- Water access
- Convenience
- Aesthetics
In other words, you’re not just hunting for an open patch of yard. You’re choosing a spot where plants can thrive and where you can realistically tend and harvest.
Sunlight
This is the most important element to consider when selecting a location for your raised bed. Sunlight is the main driver of growth, and it will greatly affect your results.
Identify potential sunny areas in your yard:
- Aim for 8 to 10 hours of direct sun per day when possible
- If you can’t get that, don’t quit. You can still grow a lot with less sun
Use these sunlight ranges to guide what you grow:
- 8+ hours: fruiting crops and many flowers
- 6+ hours: beans, peas, and root crops
- 4+ hours: leafy greens and herbs
Look around for tall structures like fences, trees, and buildings that can block the sun, especially when the sun sits lower in the sky during winter (be sure to avoid tall structures on the north side of your garden). Pay attention to where the shadows fall throughout the day, and take that into consideration.
Water Access
A garden that’s far from water becomes a hassle. Be sure to place your raised bed near a water source.
Look for a location near:
- A spigot (hose access)
- A rain barrel
- A spot where drip irrigation can connect easily
Convenience
If you’re planning a kitchen garden style setup that you’ll plant, tend, and harvest often, place it where you’ll see it and walk by it.
Keeping your garden close to your daily path is better than keeping it hidden. It will help you to remember to care for it and notice any problems like wilting or pest damage early.
Aesthetics
Raised beds are functional, but they can also be beautiful. The goal is to make the garden feel like an extension of your home and landscape, not a random box plopped in the yard.
Aesthetics tips:
- Align bed edges with existing lines (fence lines, patios, walkways)
- Match materials to your home style
- Group elements so the garden feels intentional (beds plus trellises, pots, or a pollinator border)
- Add pathways
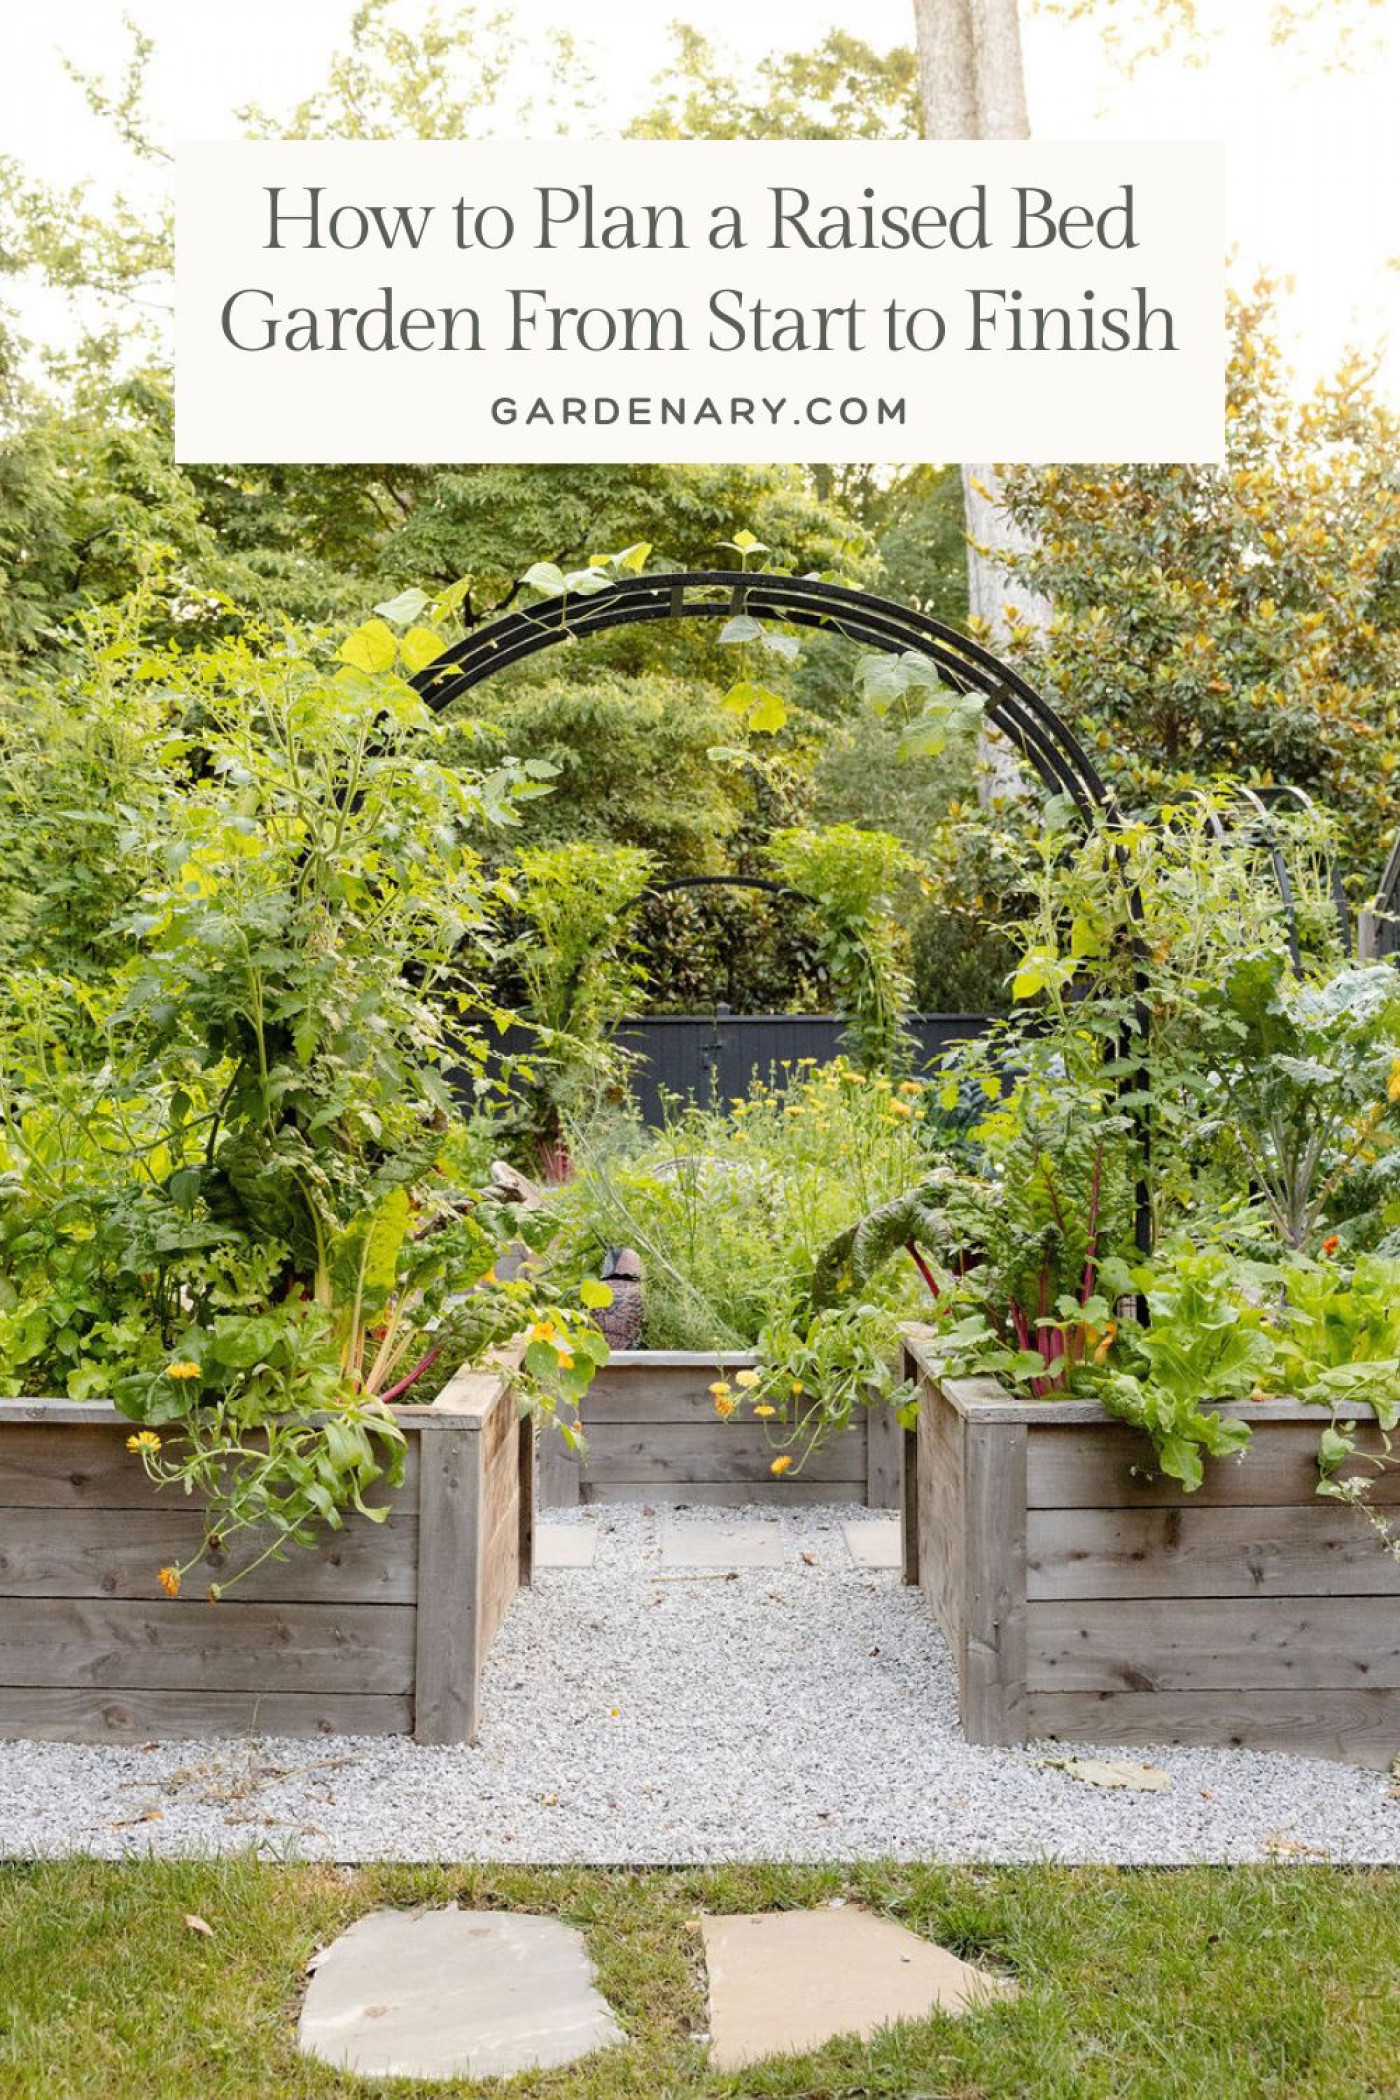
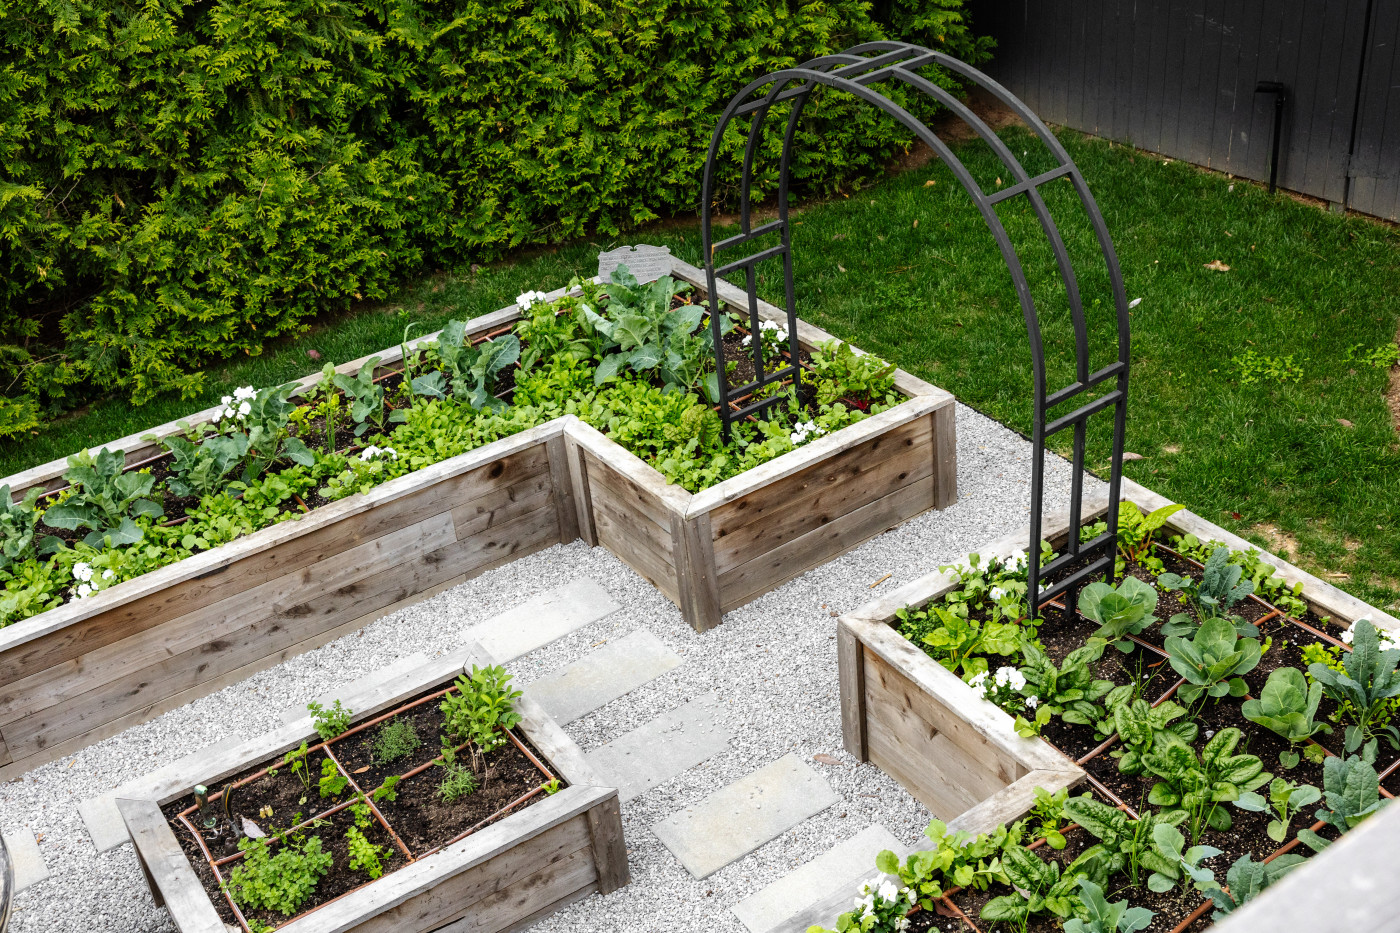
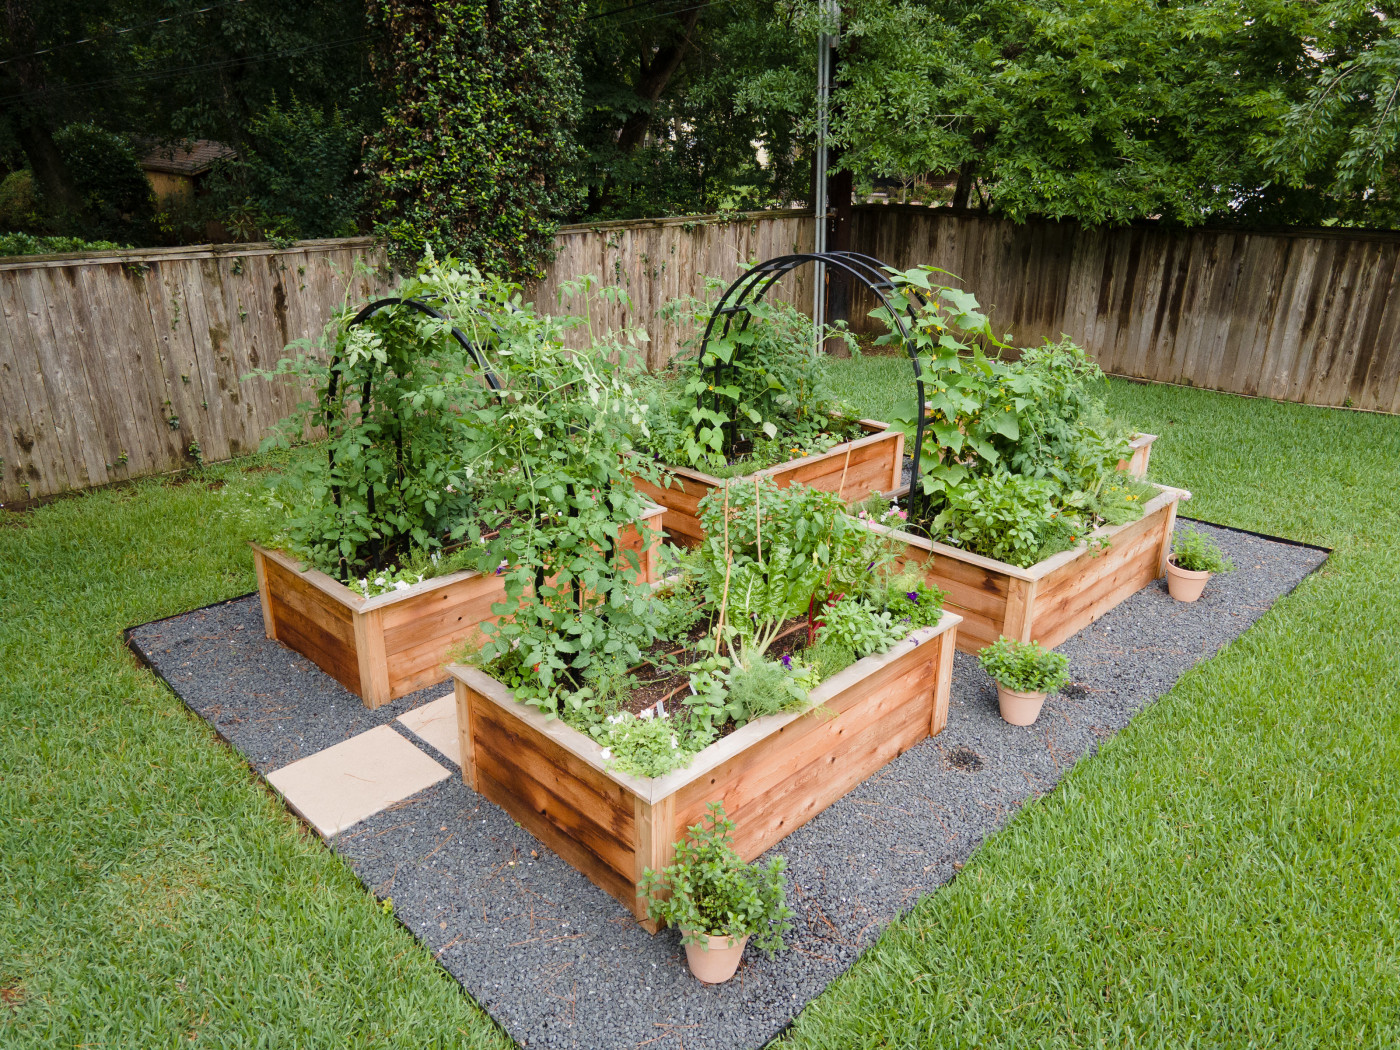
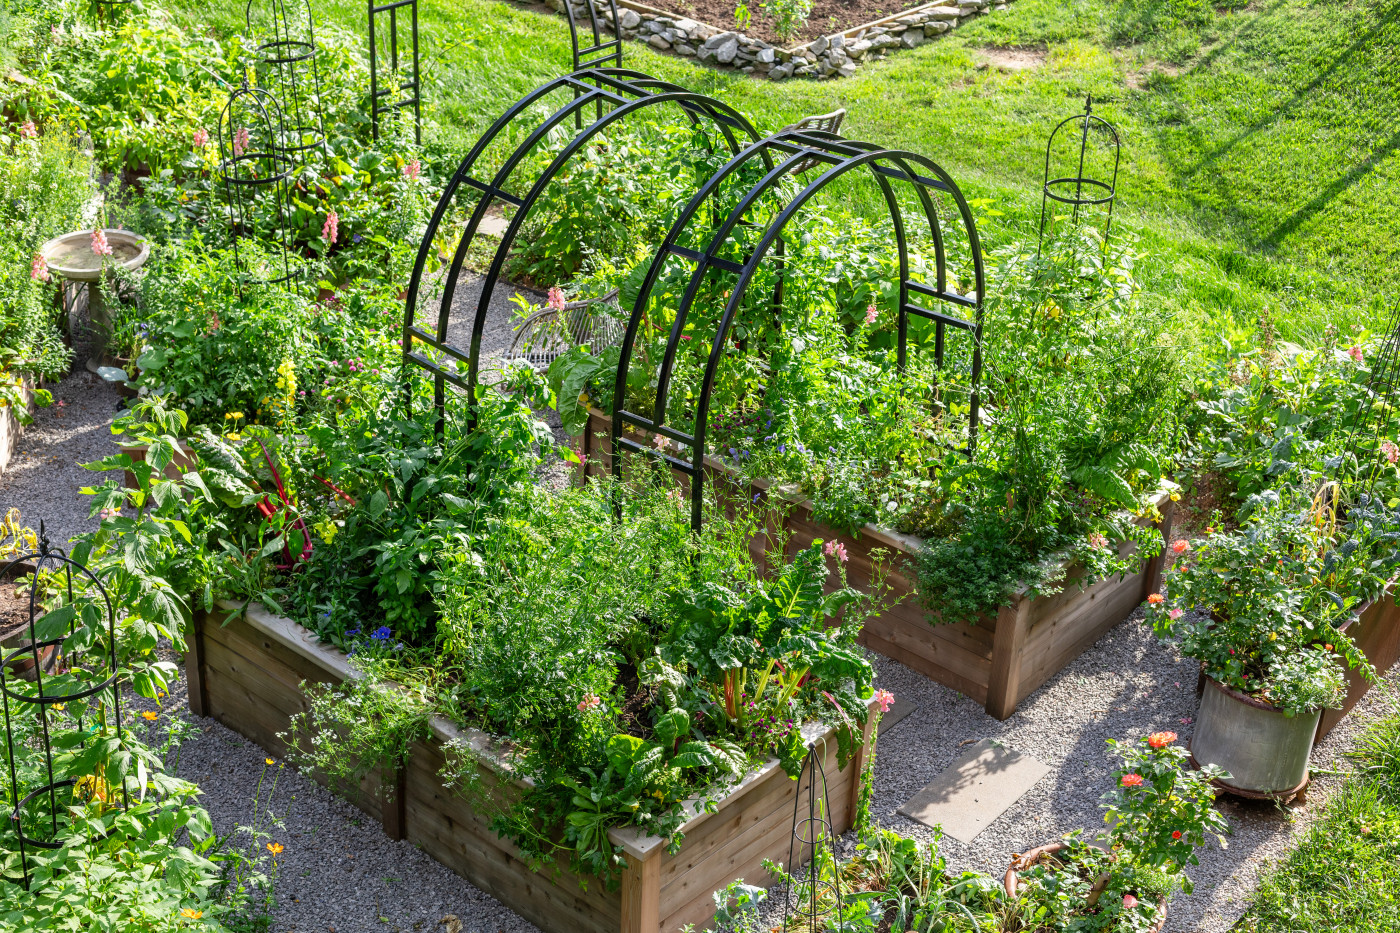
Step 2: Design Your Layout

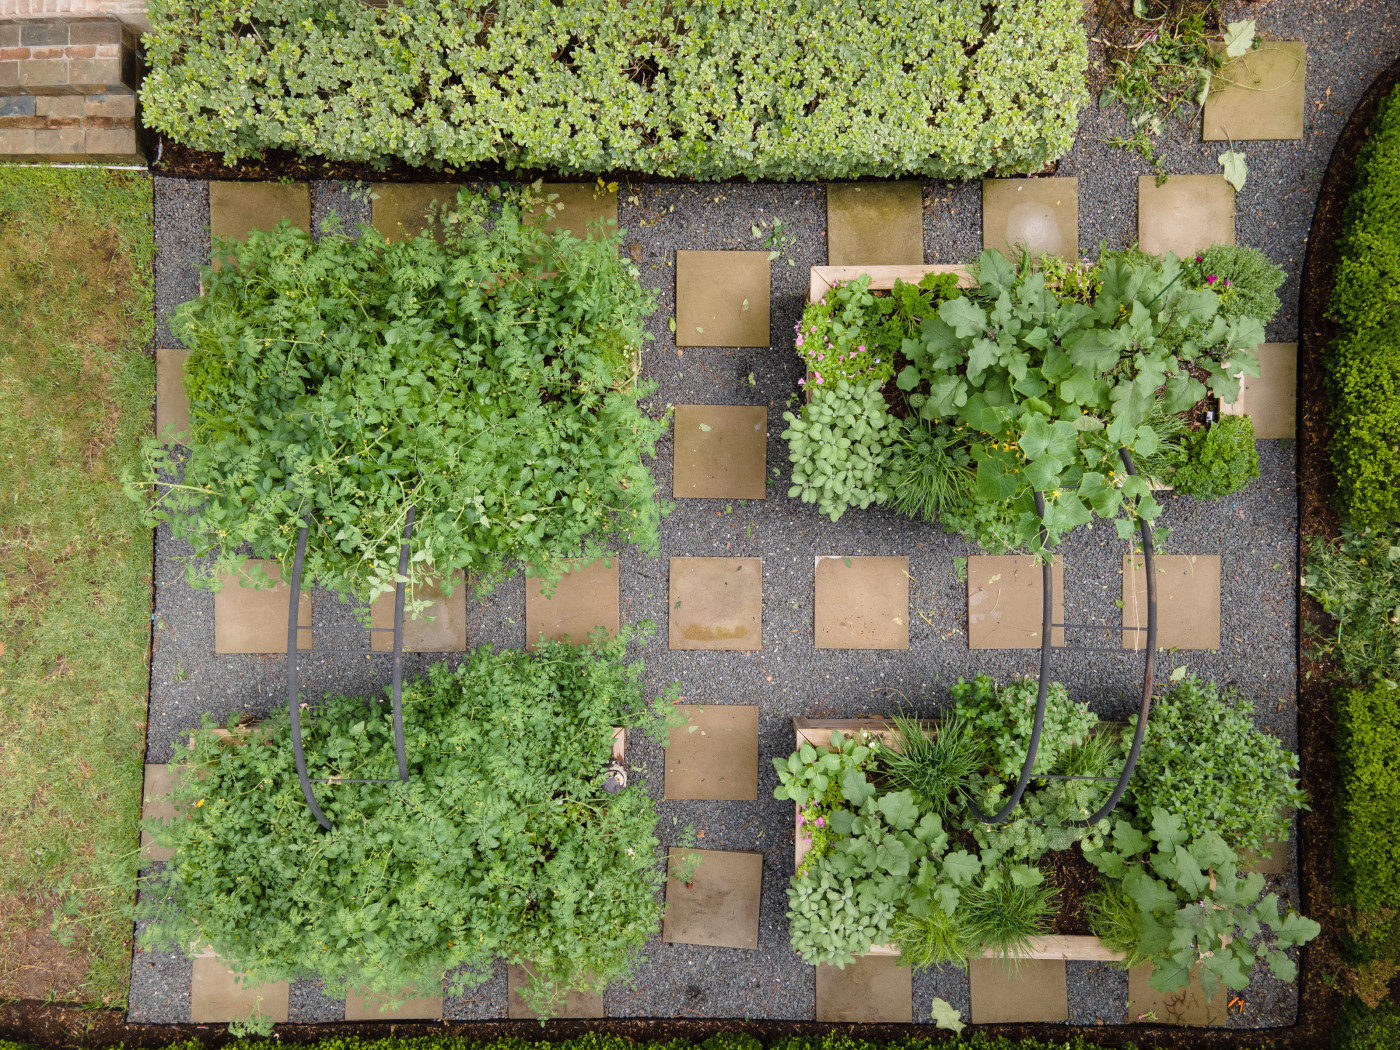
Design a Raised Bed Layout
Once you know where your garden will go, it’s time to map out how the space will function. A thoughtful layout makes your garden easier to plant, easier to maintain, and far more enjoyable to use throughout the season.
Design Questions:
- How many raised beds fit comfortably in this space?
- What shape and size will make each bed easy to reach?
- Where will trellises or support structures be needed?
- How wide do pathways need to be for easy access?
Start by thinking about how many raised beds you want and how much space you realistically have to work with. Fewer, well-planned beds are often more productive and easier to manage than squeezing in too many.
Next, consider the shape and size of each raised bed. Rectangular beds are the most common and the easiest to work in, especially for beginners. Keep bed widths narrow enough that you can reach the center at arm's length.
As you sketch the layout, decide where vertical elements, such as trellises, will go. Trellises are an important part of a productive raised bed garden because they allow you to grow upward instead of outward.
Finally, map out your pathways. Pathways aren’t wasted space. They provide access, prevent soil compaction, and make it easy to move through the garden with tools or harvest baskets. Pathways that are wide enough to walk comfortably will save you frustration later.
Gardenary Raised Bed Kits
Create your very own Gardenary-style raised bed without the sawing, measuring, or hammering of building from scratch. Gardenary’s handcrafted cedar raised beds are designed to make setting up a beautiful, productive kitchen garden simple, satisfying, and long-lasting.
Layout Ideas
Step 3: Gather Supplies

The Big Question: "Should I Build or Buy a Raised Bed Kit?"
This is the decision that can save you the most time and mental energy.
First, what material do you want your raised bed to be made of?
Common Raised Bed Materials:
- Cedar wood: for a natural, accessible option
- Steel: for a sleek, long-lasting solution
- Aluminum: durable and low maintenance
- Brick or stone: for a more permanent landscape feature
→ Learn more about raised bed material types.
Option 1: Buy a Pre-built Raised Bed or a Raised Bed Kit (Most Convenient)
If you want to reduce friction and speed up installation, a raised bed kit removes many of the most common DIY headaches. Everything arrives sized correctly and ready to assemble, which allows you to move quickly to the steps that really affect plant success.
If your goal is momentum, a kit is often the fastest path to a finished garden. If your goal is ease, a raised bed kit or pre-built bed is the easiest way to go.
Benefits of a Raised Bed Kit
- Easier assembly with fewer tools
- Faster setup so you can focus on planting and soil
- Fewer mistakes, especially if you’re new to measuring and building
- A more consistent, polished look across multiple beds
- Skip inconvenient building tasks like:
- Sourcing and transporting lumber
- Measuring and cutting boards
- Rechecking calculations multiple times
- Scrambling for the right screws, tools, and hardware
Corten Steel Raised Beds: Sleek & Long-Lasting
This corten steel raised bed combines clean lines, exceptional durability, and a thin-profile design that maximizes planting space without sacrificing strength. Designed with an open bottom, it allows plant roots to grow deep into native soil—ideal for permanent garden installations and productive kitchen gardens.
Option 2: Build Your Own Bed
If you’re the type who loves a DIY build, go for it!
With your layout decided, you can gather materials confidently instead of guessing.
First, you'll need to know your dimensions to buy the right-sized boards.
Choose Your Raised Bed Dimensions
Raised bed sizing matters for plant health and for your body.
Width
- Minimum: 1.5 feet (46 cm) wide
- Ideal maximum: 4 feet (1.2 m) wide
- If a bed is against a wall or fence, keep it about 2 feet (61 cm) wide so you can reach the center comfortably
Height
- Minimum: 6 inches (15 cm)
- Common, productive depth: 12 inches (30 cm)
- Great for broader planting options: 18 inches (46 cm) to 24 inches (61 cm)
Benefits of Taller Beds:
- easier access for pruning, harvesting, and daily care
- less strain on knees and back
- a more polished, “designed” look
Length
- Most common: 4 to 8 feet (2.4 to 3.7 m) long


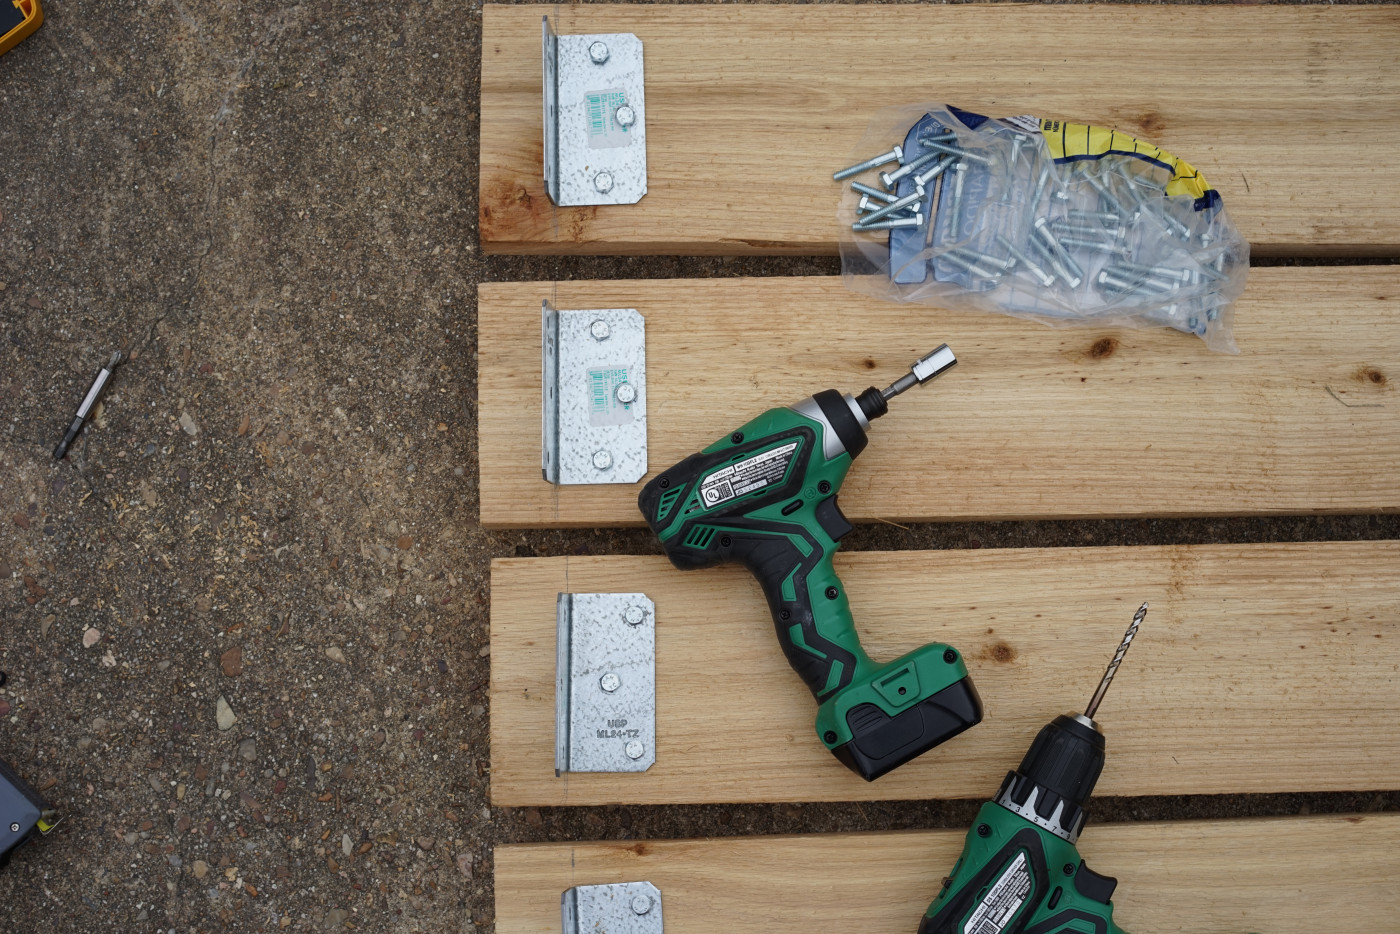
Raised Bed Materials Checklist
Gather everything you’ll need so installation day goes smoothly. Having materials ready ahead of time saves time, frustration, and multiple trips to the hardware store.
Raised Bed Structure
- Untreated wood boards (cedar, redwood, or untreated pine)
- Corner supports or brackets (if not using a kit)
- Galvanized or exterior-grade screws
Tools
- Drill or screwdriver
- Hammer (if using nails, but we recommend screws)
- Measuring tape
- Level
Ground Prep & Installation
- Weed barrier fabric
- Stakes or landscape pins (to secure fabric)
- Shovel
- Tamper (or your foot) for leveling soil
Soil & Filling
- Topsoil
- Compost
- Coarse sand
- Worm castings or fully composted manure
- Wheelbarrow or garden cart
- Water hose
Optional Add-Ons
- Trellis or support system for climbing plants
- Landscape edging or border material
- Pathway material (wood chips, gravel, or mulch)
- Timer (if planning drip irrigation)
- Drip lines or soaker hoses
Step 4: Assemble & Install

L-Shaped Raised Bed
- Pre-assembled panels for easy installation
- Handmade in the USA
- Premium untreated cedar
- Designed for long-term outdoor use
- Perfect for Gardenary-style kitchen gardens
How to Build a Raised Bed
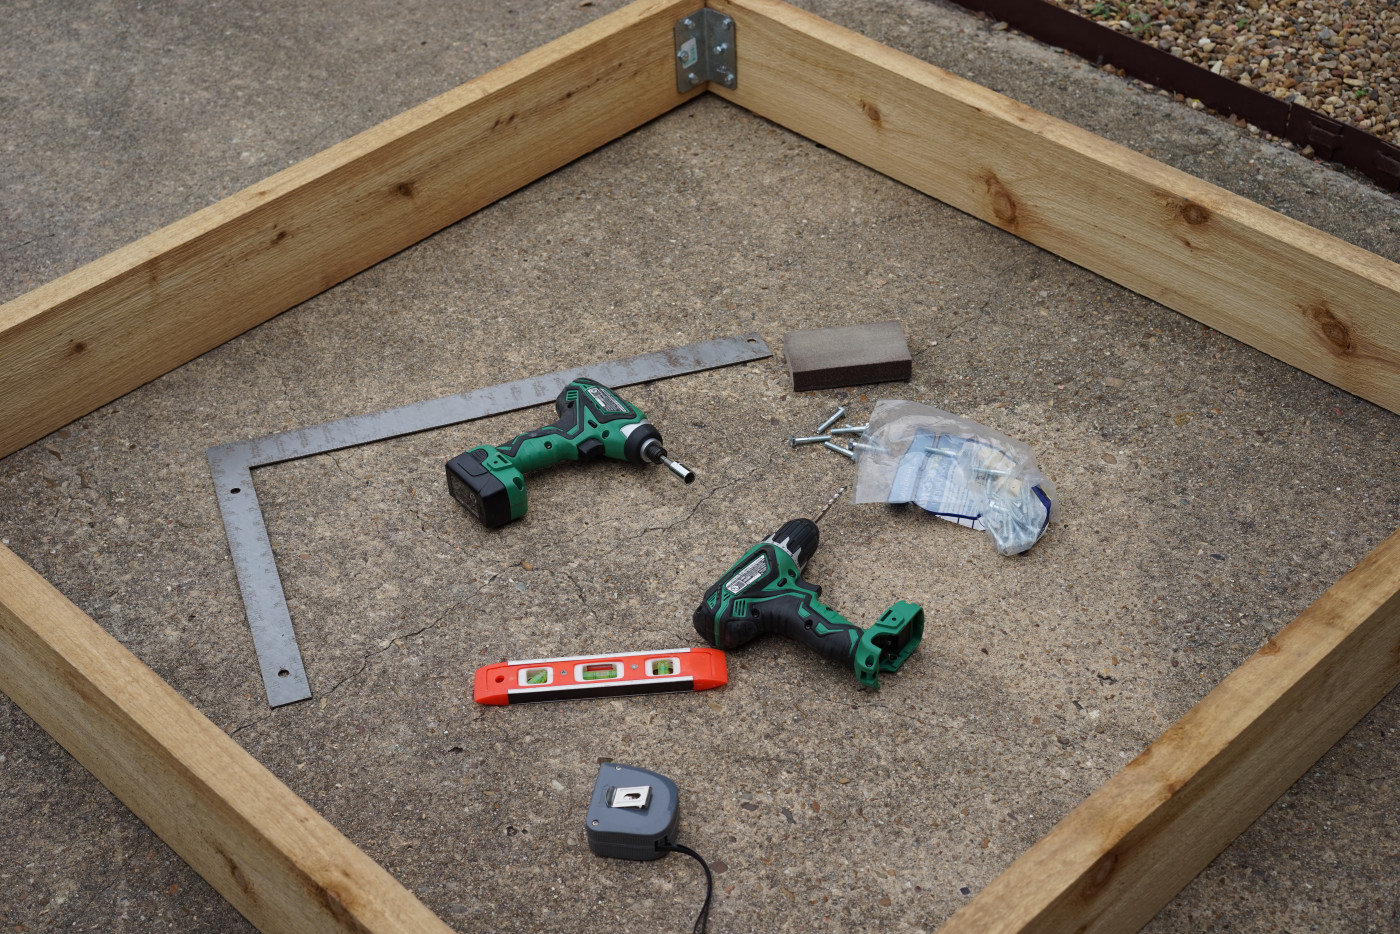
Building or assembling your raised bed is often the most intimidating part, but it doesn’t need to be complicated. Whether you’re assembling a kit or building from scratch, the goal is a sturdy structure that can support a large volume of soil.
The basic structure of a cedar raised bed is simple. Boards are connected at the corners (use corner brackets and screws) to form a rectangular or square box, then, if additional height is needed, stack more rectangles or squares on top.
When building, keep these principles in mind:
- Measure carefully so corners align cleanly
- Assemble each box layer separately before stacking
- Check that corners are square before tightening screws
- Reinforce the longer sides to prevent bowing once filled with soil
If you’re building a taller bed, stack multiple layers and secure them together so the structure remains strong under the weight of soil.
More Articles About Building a Raised Bed
How to Install a Raised Bed
Before filling your beds, take time to prep the space properly. Doing the prep work upfront prevents issues like soil shifting, uneven watering, and long-term maintenance problems.
Prepare the Space
- Clearing grass or vegetation from the area
- Leveling the ground so beds sit evenly
- Installing weed barrier or cardboard if needed
- Setting beds in place and checking alignment
- Stake the entire garden area: Use string to outline straight lines (this becomes your guide for borders and bed placement)
- Clear the area: Remove grass and vegetation so you start with a clean slate.
- Level the garden area: Use a shovel or rake to scrape away high spots until the surface is mostly even, and add sand or gravel where needed to smooth dips.
- Prevent weeds: You can use: weed barrier, cardboard, or landscape fabric in pathways. If you plan to run irrigation lines under beds, do that before you lay barriers.
- Place the garden beds
- Add pathway materials: place stepping stones first if you’re using them, then add gravel or other pathway material.
- Set trellises
Prefer to Stand While Gardening?
Gardenary’s Elevated Cedar Raised Bed Planter makes gardening easier, cleaner, and more accessible—without sacrificing beauty or productivity. Handmade in the USA from premium, untreated cedar, this standing planter is designed for gardeners who want to grow fresh food at a comfortable height on patios, balconies, and small outdoor spaces.
Step 5: Add Soil

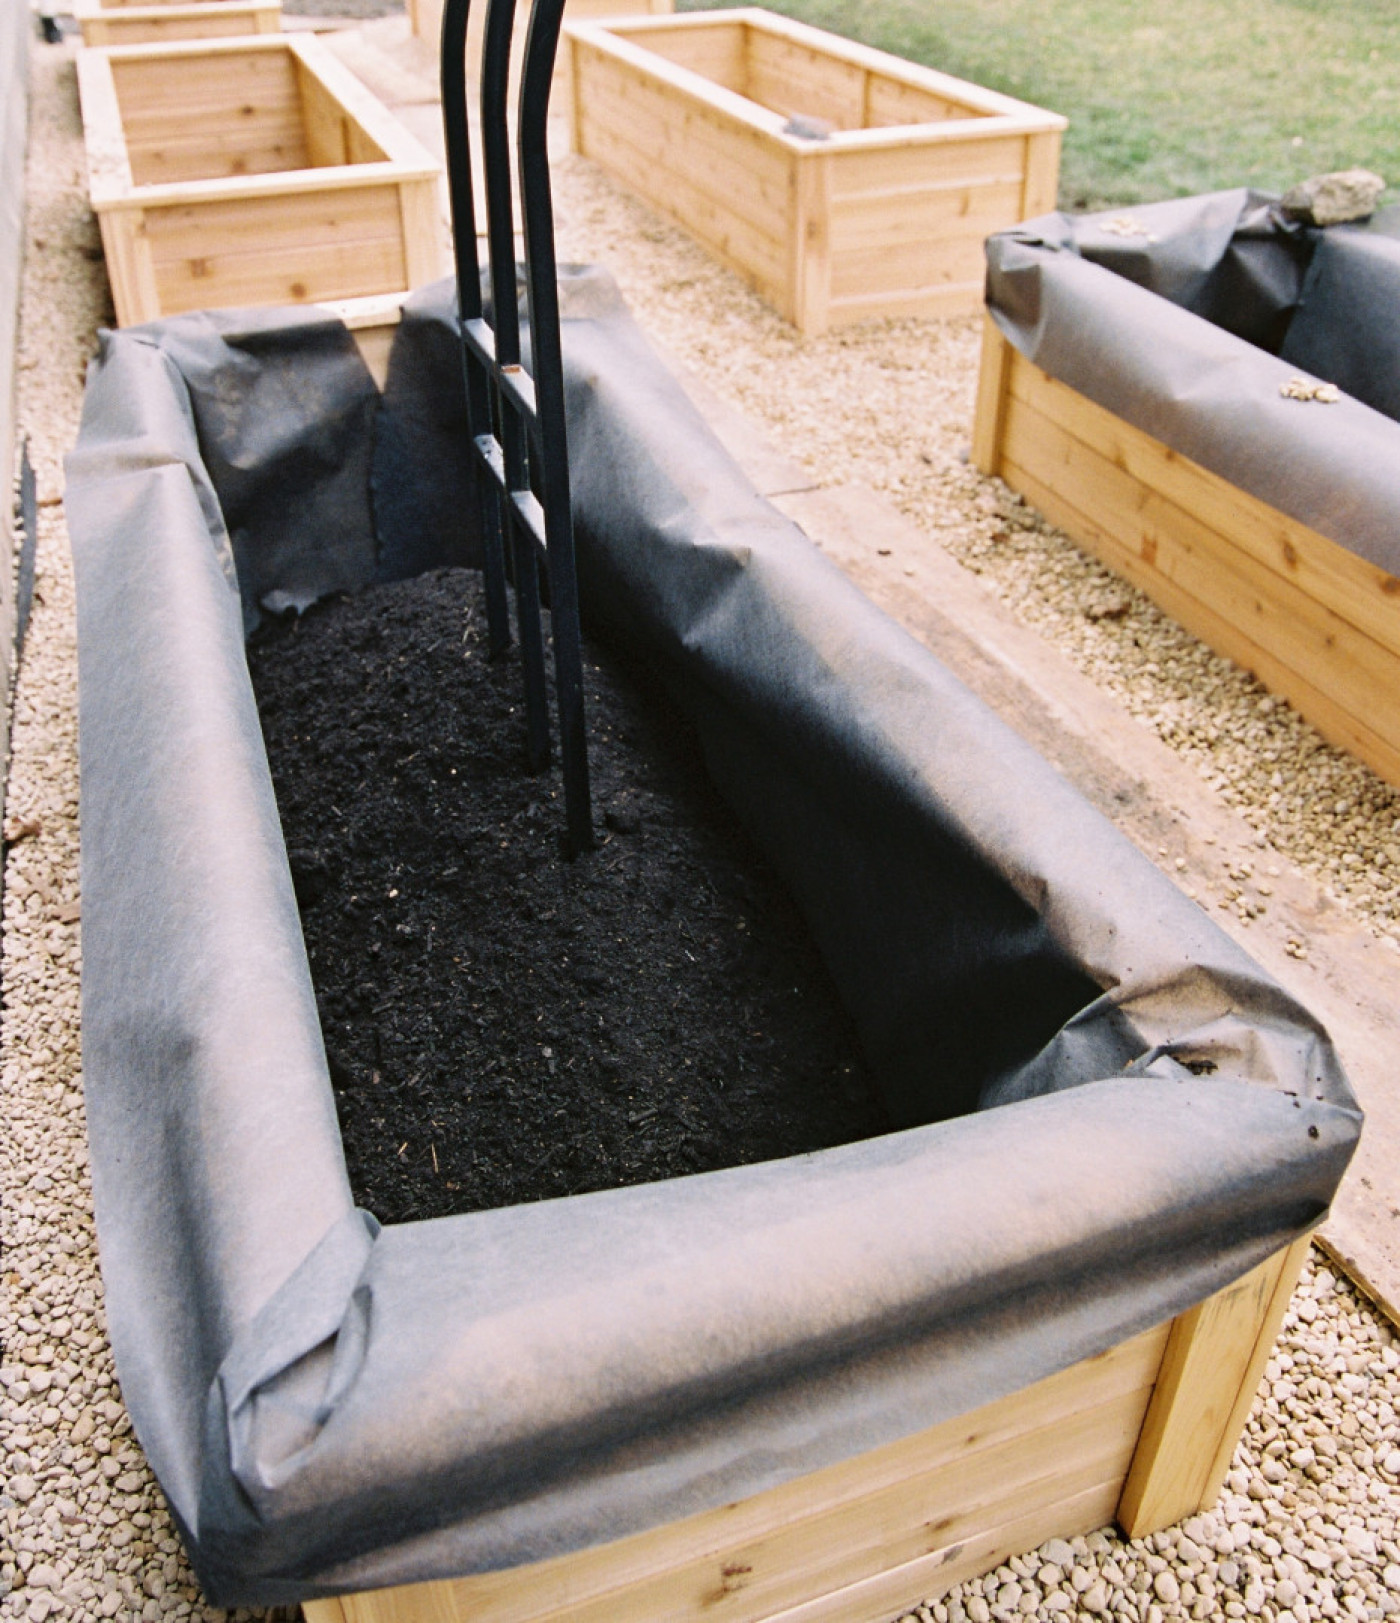
Fill Your Raised Beds
Raised beds give you the advantage of building an ideal soil mix from the beginning.
Best Soil Blend
- Topsoil for structure
- Coarse sand for drainage
- Compost for nutrients and moisture retention
- A small amount of fully composted manure or worm castings
Before purchasing soil, calculate how much you need, so you don’t run short mid-install. Measure each bed’s length, width, and height to determine total volume, then convert to cubic yards if ordering in bulk.
Easy Raised Bed Soil Calculation Formula
To figure out how much soil you need, use this simple formula:
Length × Width × Height = Total cubic feet
Then, Convert to Cubic Yards (for Bulk Soil Orders)
Total cubic feet ÷ 27 = Cubic yards
When filling beds:
- Add soil gradually and water lightly to help it settle
- Install trellises halfway through filling so they’re anchored deeply
- Fill beds all the way to the top for maximum growing space
Learn More About Soil
Step 6: Select a Watering Method

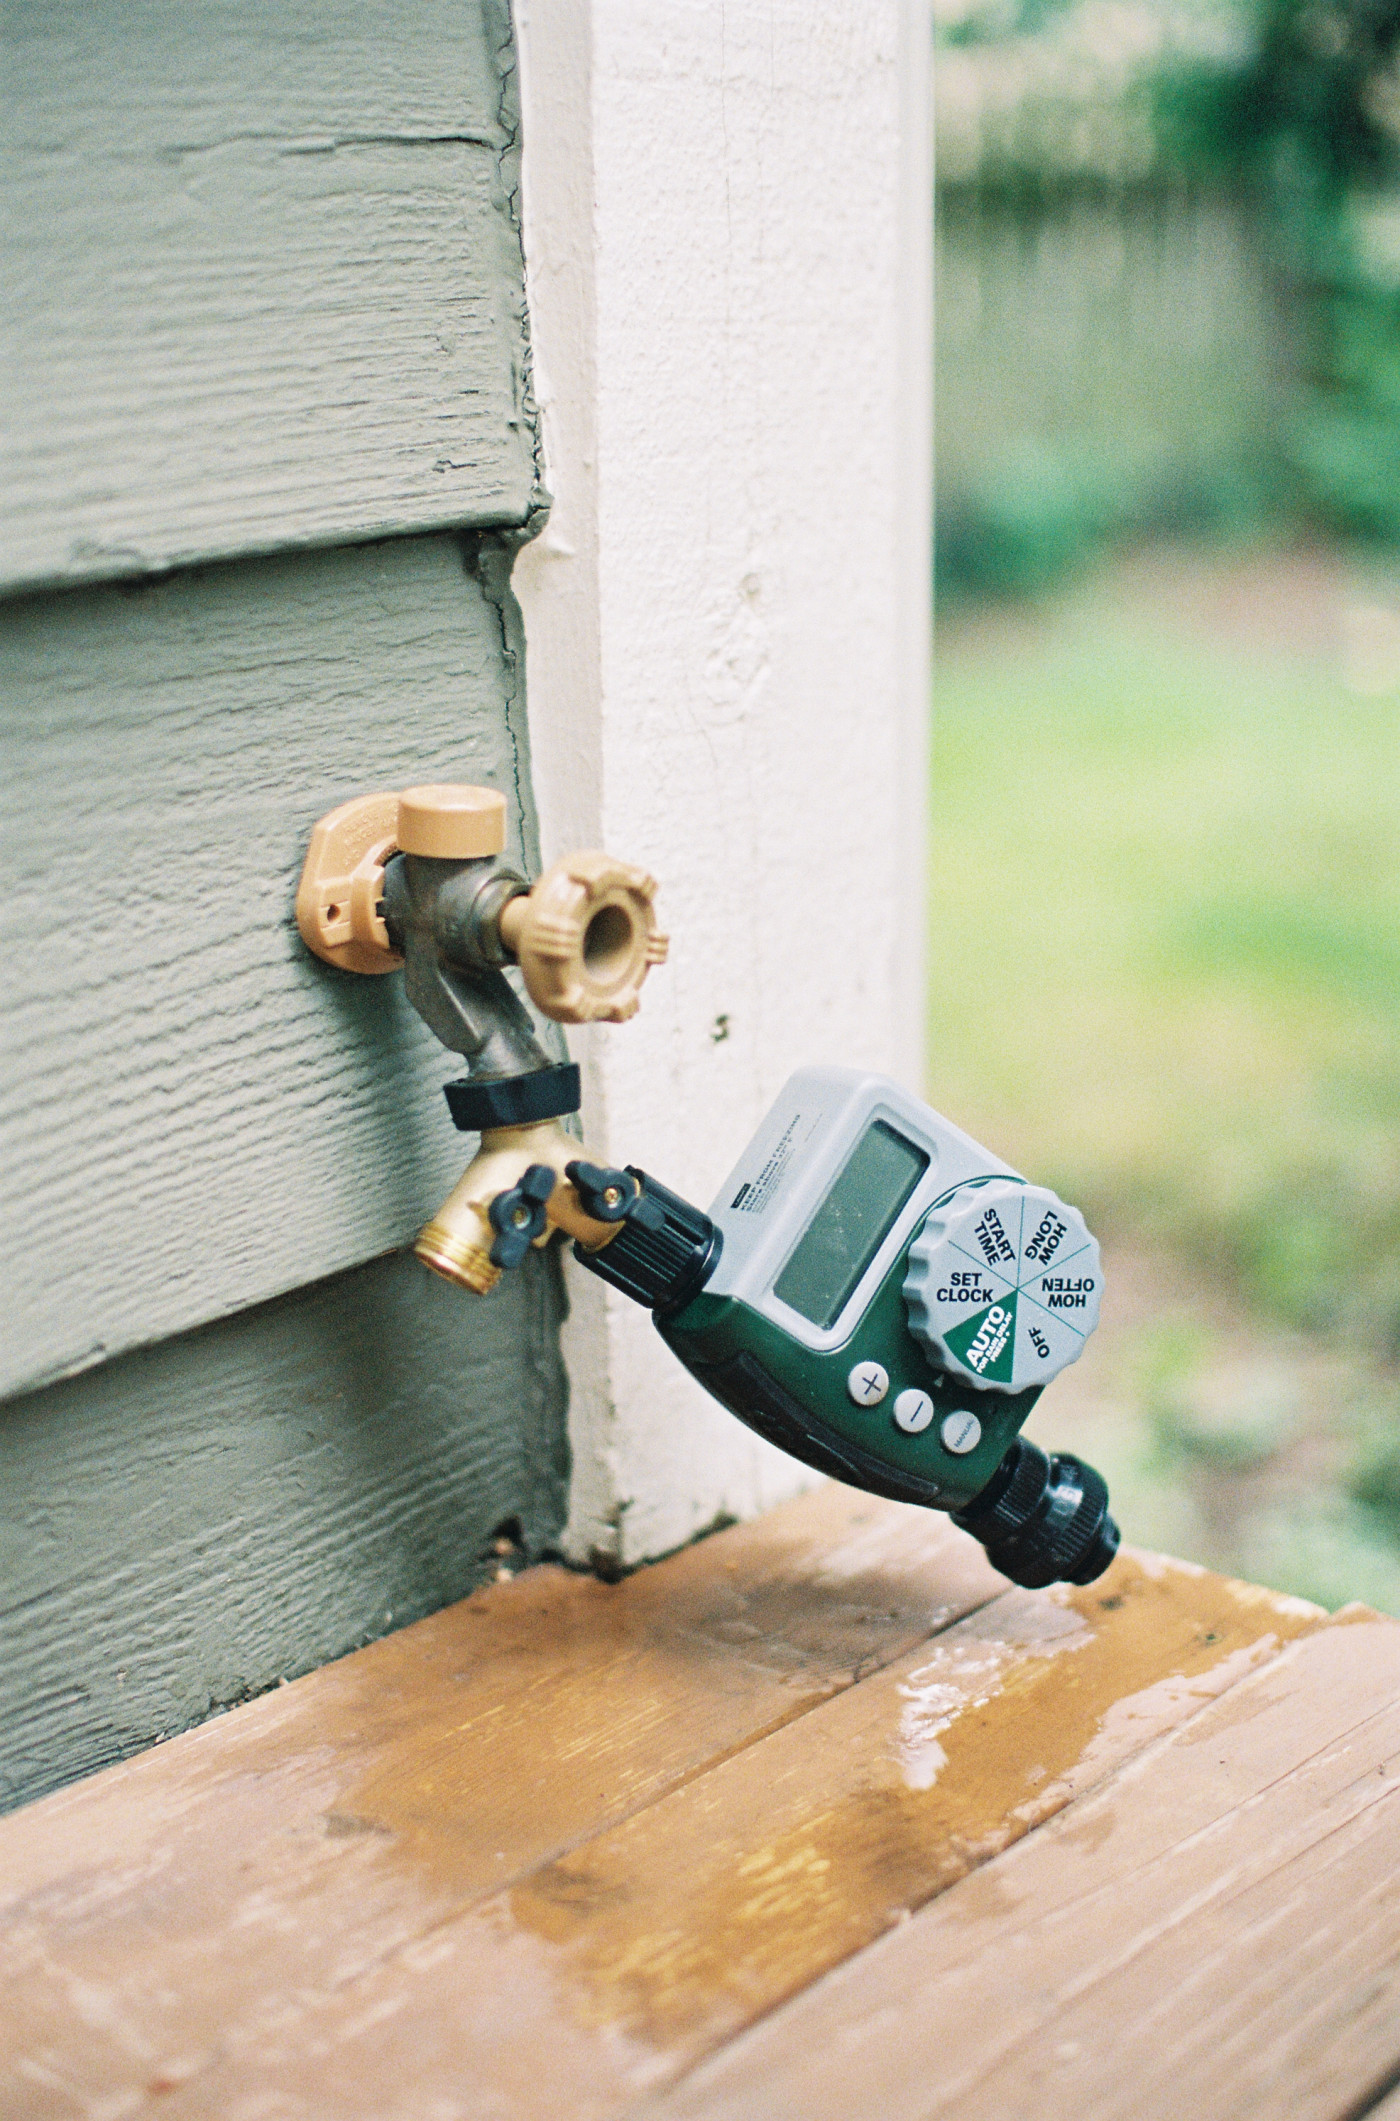
Raised Bed Watering Options
Watering your raised bed doesn’t have to be complicated, but it does need to be consistent. The best watering system is simply the one you’ll actually use on a regular basis. When plants receive steady moisture, they grow stronger, produce more, and handle seasonal stress far better.
Watering options range from very simple to more automated, and each comes with its own benefits. There’s no single “right” choice. The goal is to choose a system that fits your space, schedule, and lifestyle so watering becomes part of your routine instead of a constant struggle.
Common Watering Options for Raised Beds
- Hand watering using a hose, spray nozzle, or watering can
- Soaker hoses laid along the soil surface to deliver water directly to the roots
- Drip irrigation systems connected to a spigot and timer
- Fully automated irrigation systems with timers and sensors
Learn More About Raised Bed Irrigation
Join Our Free Online Workshop!
Ready to finally grow a garden that works? Join our free Garden Game Plan workshop and walk away with a clear, simple plan so you know exactly what to plant, where to plant it, and when, without the overwhelm.
Step 7: Pick Your Plants

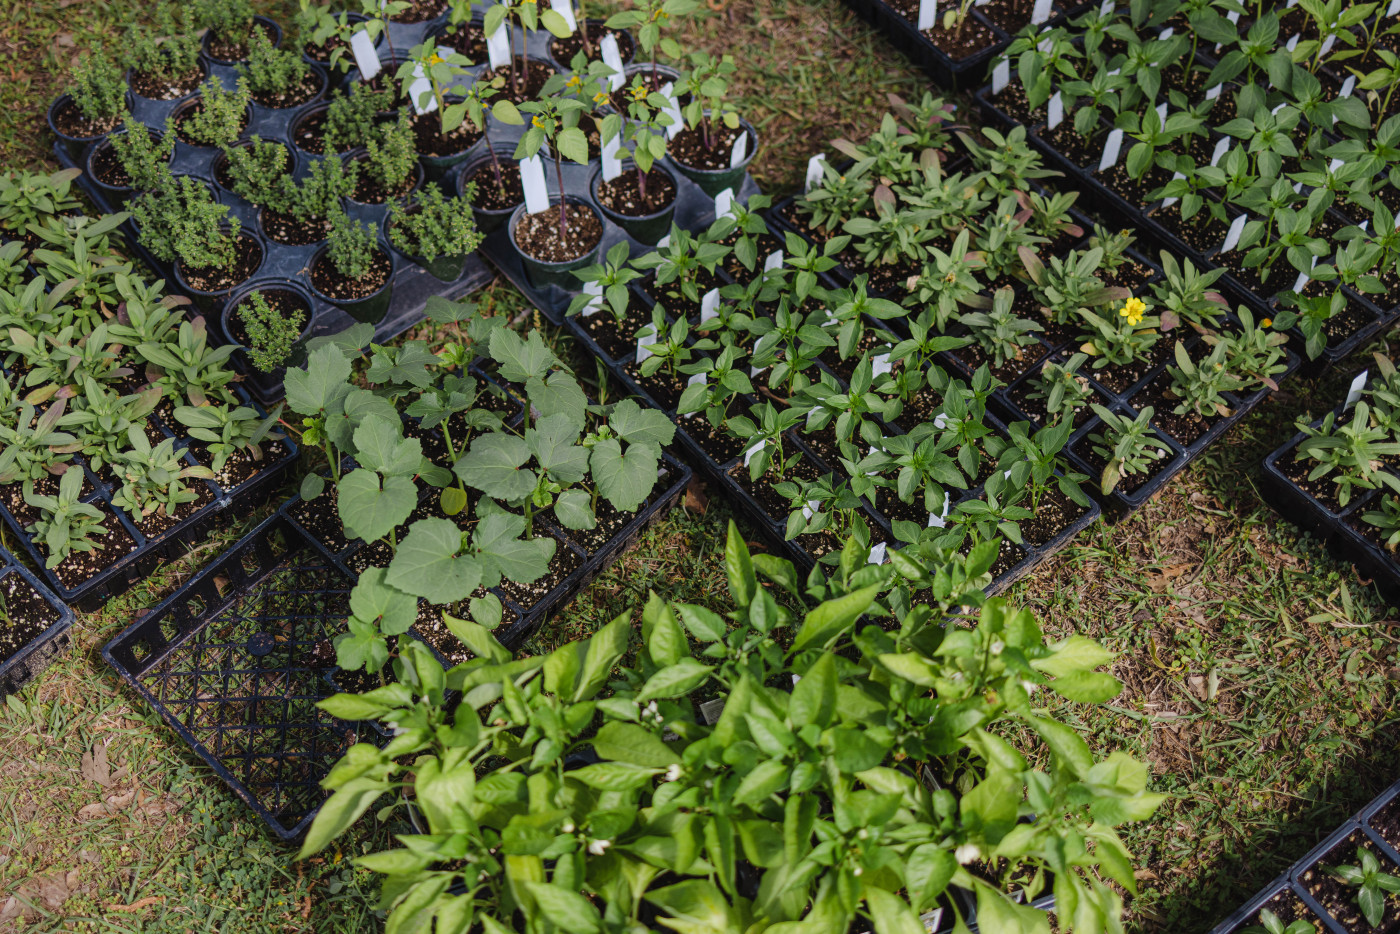
Pick Plants Based on Season and Size
Plants aren’t interchangeable. They thrive in specific temperature ranges and grow to very different sizes. Understanding this makes planning much easier.
Instead of thinking only about what you want to grow, think about when each plant grows best.
Mix Plant Sizes
- Small plants that grow quickly
- Medium plants that provide steady harvests
- Large plants that anchor the season
By mixing plant sizes within the same season, you keep beds productive and visually full instead of waiting months for just one harvest.
Select Your Plants for the Season
Learn How to Plan and Build Beautiful Raised Beds
Follow a simple process to build a raised bed that makes construction straightforward — even if you’re not “handy.”
Step 8: Place Your Plants

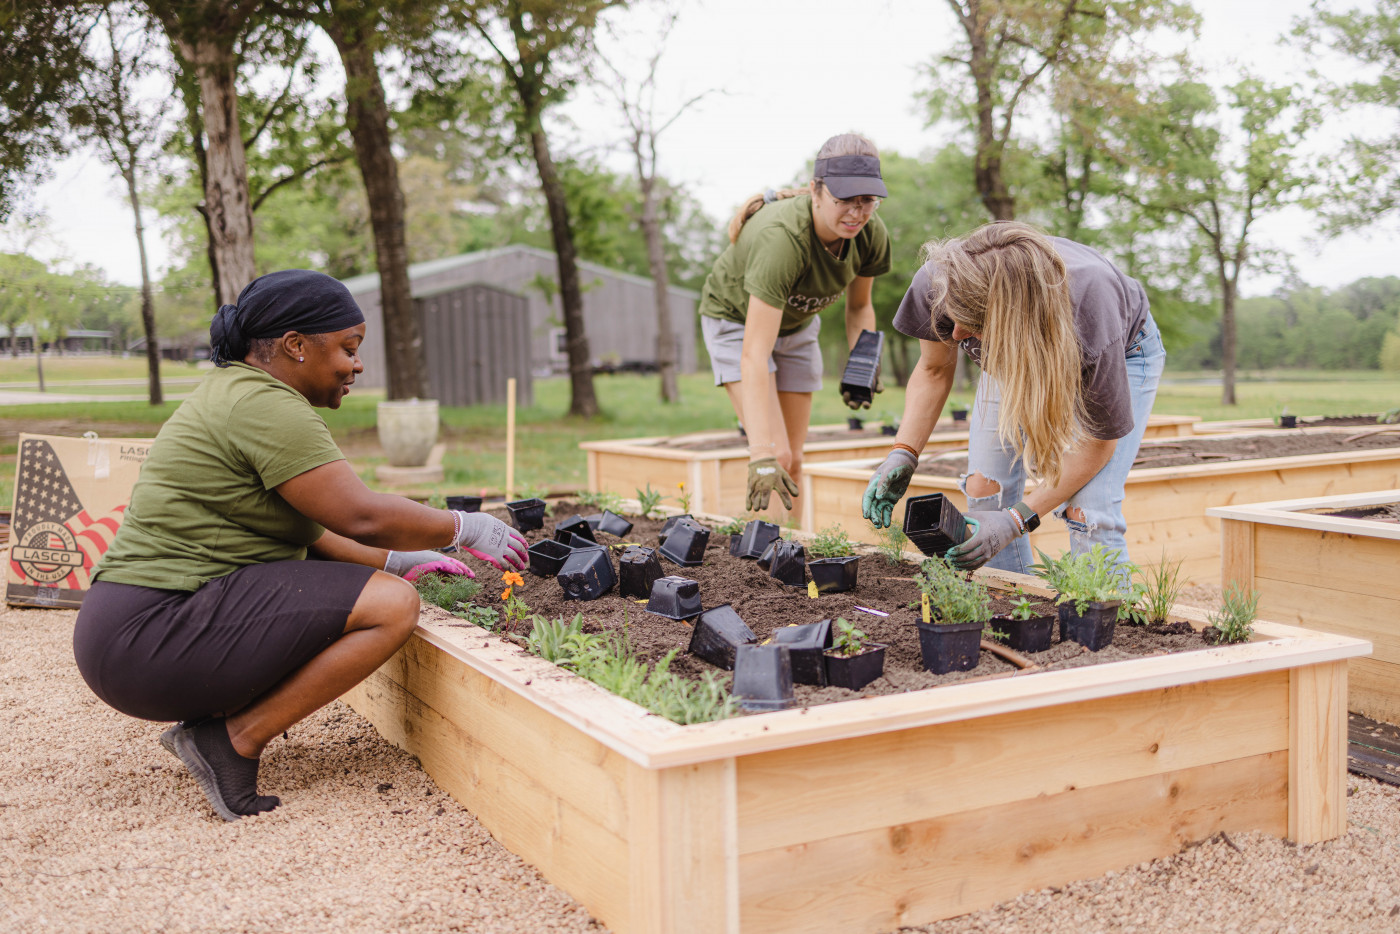
Step 8: Place Plants Using an Intensive Planting Approach
Raised beds are perfect for a planting method called "intensive planting", which means placing plants closer together than traditional spacing guidelines suggest.
Benefits of Intensive Planting
- Increases overall harvest
- Reduces exposed soil and weed pressure
- Helps soil retain moisture
- Creates a fuller, more resilient garden
Intensive planting works best in raised beds with deep, healthy soil and gardeners who tend their beds regularly. The idea is to fill space intentionally instead of leaving bare soil open to weeds and evaporation.
Start with larger plants in the center (or in the back if your garden is against a fence or wall), tuck medium plants around them, and fill remaining gaps with smaller crops or herbs.
Instead of organizing plants into rigid squares, think in terms of circles rather than grids. The garden will feel more intuitive, more productive, and more visually appealing.
Plants are arranged by size and role, creating a layered structure:
- Herbs and flowers line the outer edges, creating a living border that attracts pollinators and helps deter pests
- Leafy greens are planted along the edges for easy, frequent harvesting
- Root crops sit just inside the borders, growing quietly beneath the surface
- Fruiting plants anchor the center or back of the bed, where they can mature undisturbed
This intentional grouping allows plants to share space efficiently, shade the soil, and support one another. The result is a garden that’s easier to maintain, more productive, and naturally beautiful, with every plant placed for a clear purpose.

A Well-Planned Raised Bed Makes Gardening Easier
The success of a raised bed garden comes down to a few key decisions made early. Choosing a sunny, accessible location, filling beds with great soil, and planting strategically all work together to reduce problems later.
When these basics are in place, gardening feels simpler and more rewarding. Instead of constantly fixing issues, you can spend your time harvesting, learning, and enjoying the process.
A well-planned raised bed removes unnecessary work so your garden can thrive. When all is said and done, you'll be rewarded with your own organically grown food, and I bet you'll have plenty of veggies to share.
Click the image below to save this article for later!